F5 CRIMP GUIDE | INSTALLATION GUIDE
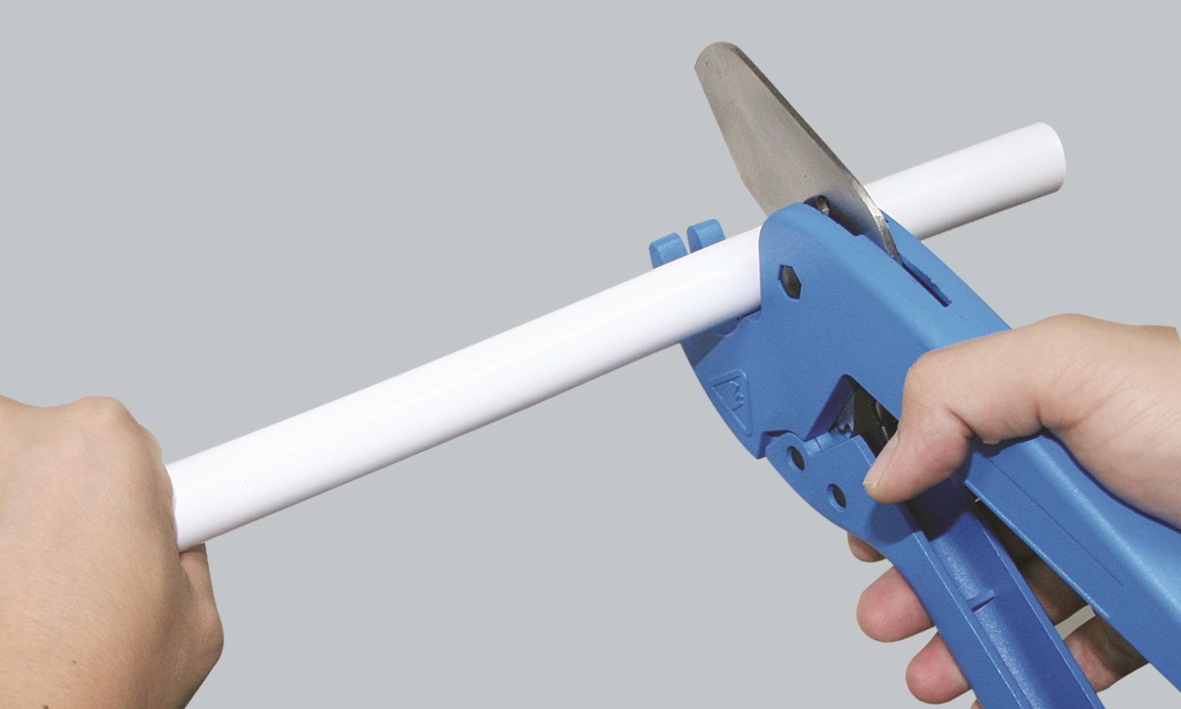
STEP 1
To cut the pipe ensure the blade of the cutter is straight across the pipe. This will ensure a firm connection to the fitting.
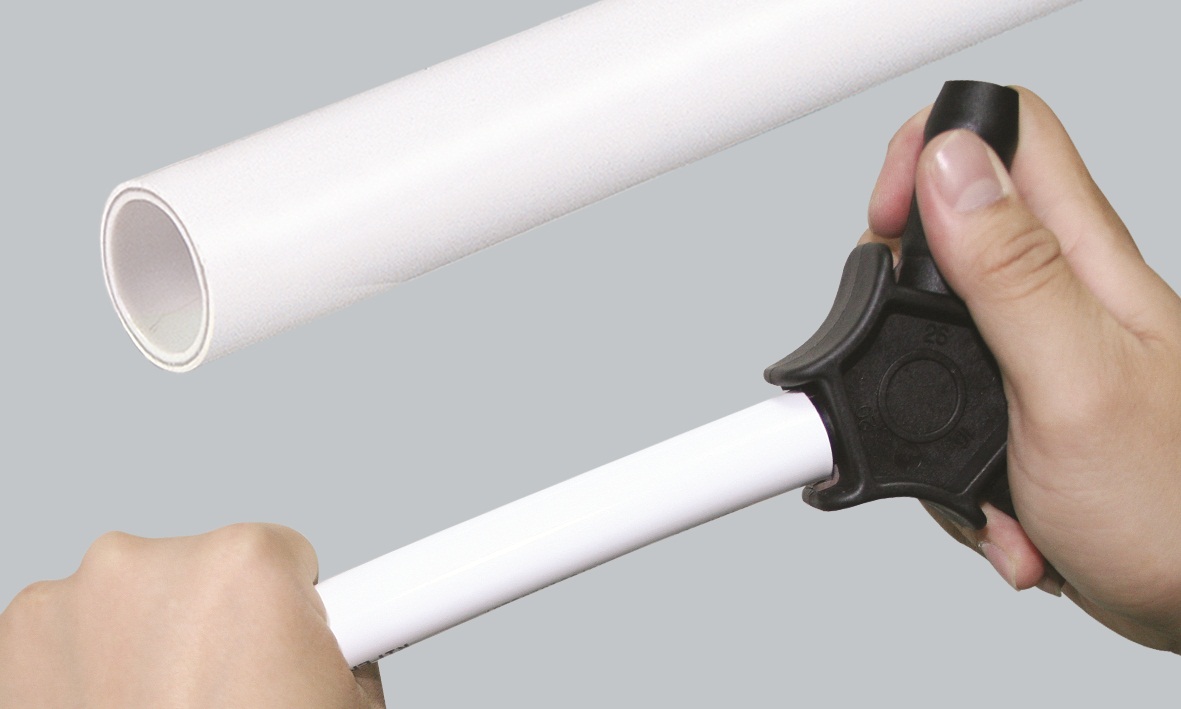
STEP 2
Prepare the ends with the reamer. Push into the pipe and while exerting pressure, twist the bevel all the way round. Plastic shavings should come away from the pipe. The bevel is complete when no more appear.
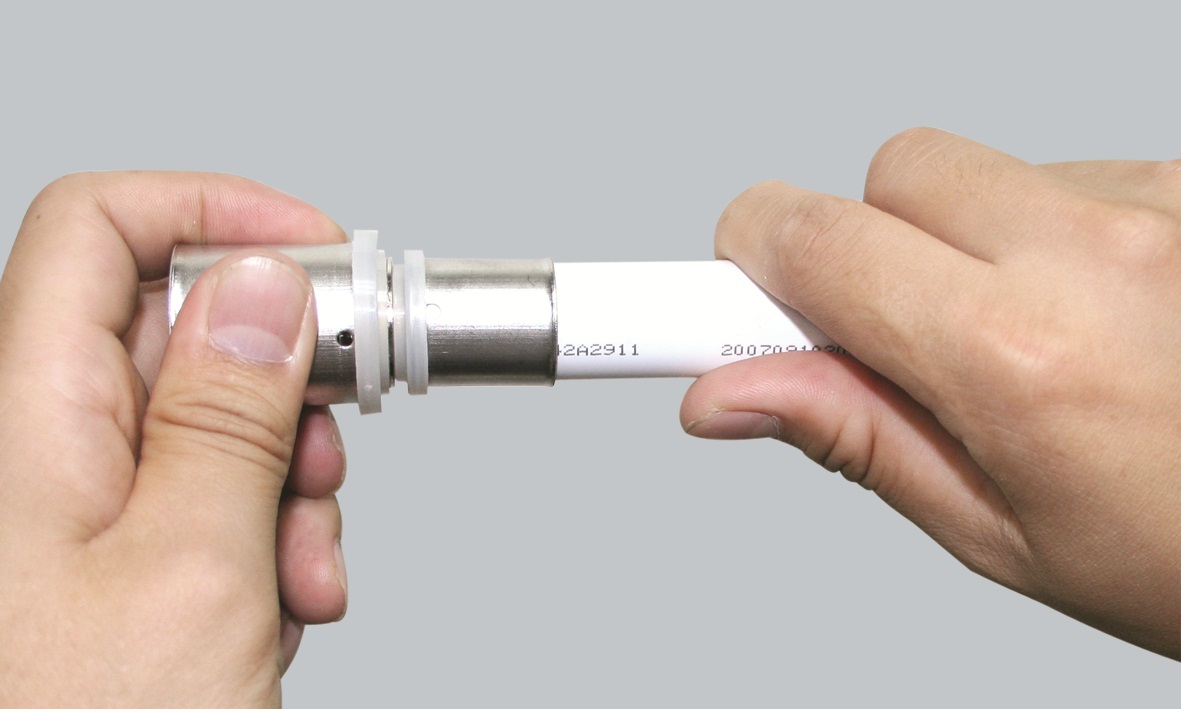
STEP 3
When fitted, ensure that the double O-rings are intact and free of dirt. Push the crimp firmly into the bevelled pipe. Check that the pipe can be seen through the three holes in the sleeve of the pipe. This indicates that it is fully inserted.
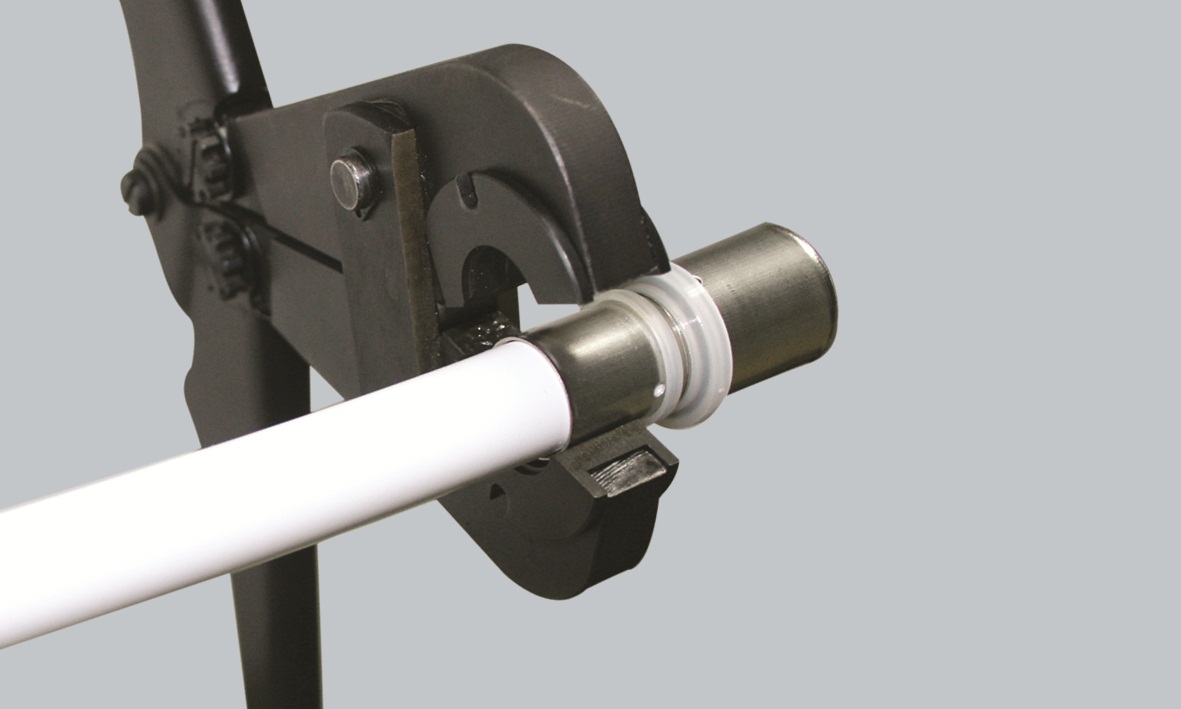
STEP 4
Clamp together firmly. Manual clamps should apply approximately 5 kg of pressure at the head. Powered clamps should be properly calibrated, and use U-profile jaws. Ensure the clamp head is flush with the plastic disc at the base of the fitting and press.
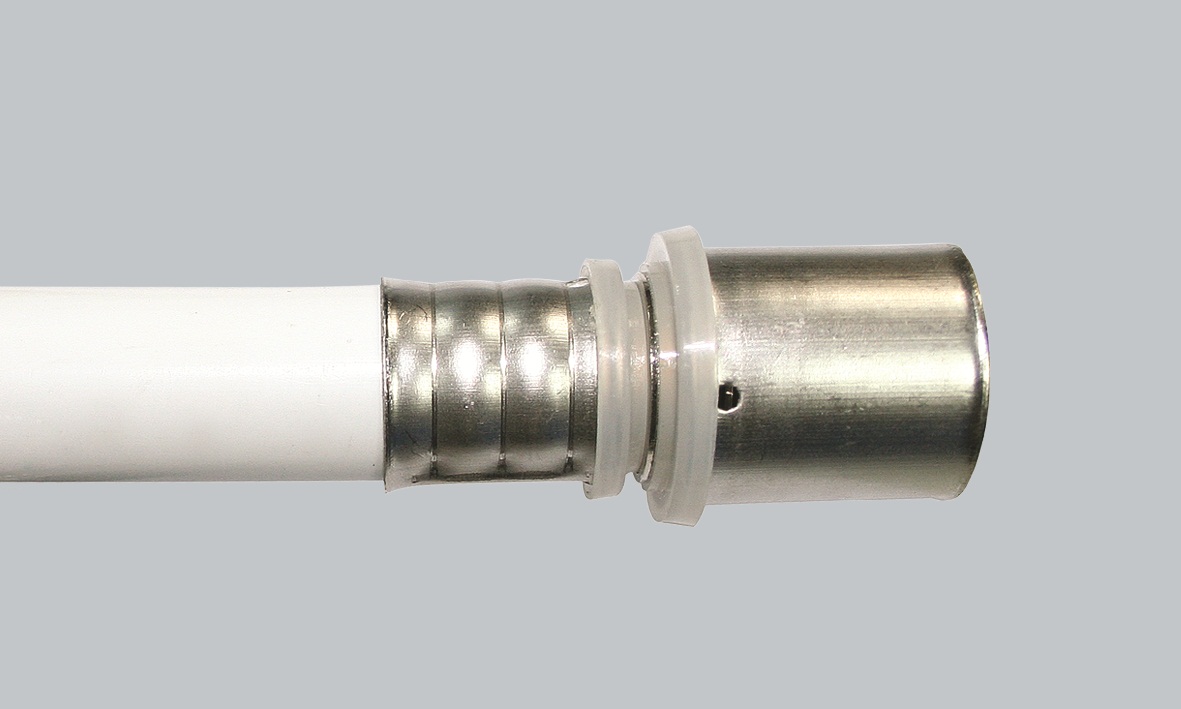
STEP 5
Check the fitting. It should appear as pictured below. There should be three lines going straight around the sleeve. This forms a hard wearing seal over the double O-rings. This completes the crimp fitting.
What is Crimping?
If you’re looking for a straightforward guide to crimping, it starts with understanding the basics. Crimping is a reliable method of joining pipework to fittings by mechanically compressing a metal sleeve around the connection point. Instead of relying on heat, solder, or adhesives, a crimper tool applies force to create a tight, permanent seal that locks the pipe and fitting securely together.
This process ensures a leak-proof, durable joint capable of handling the demands of modern plumbing and heating systems. Because it’s quick, safe, and consistent, crimping is a preferred choice in both professional installations and DIY projects.
Types of Crimps
When following crimping instructions, choosing the correct crimp type is vital. Different profiles are designed for different systems, tools, and applications. The most common crimp types include:
- F5 Plumbing Crimp Fittings – An industry-standard option, widely used in underfloor heating installations thanks to its strength, durability, and ease of use.
- U-Profile – A versatile profile compatible with many pressing systems, offering dependable joint performance.
- TH-Profile – Typically used in plumbing where extra grip and seal security are required.
Understanding these types of crimps helps you follow the correct crimping guide for your project and ensures compatibility between your crimper tool, sleeve, and pipework - resulting in a watertight finish that lasts.
Crimping Guide: Key Takeaways
- Always follow the manufacturer’s crimper instructions for tool use and pressure settings.
- Match the sleeve, tool, and pipework to the correct crimp type for a secure fit.
- A proper crimping guide guarantees consistent, leak-free results.