
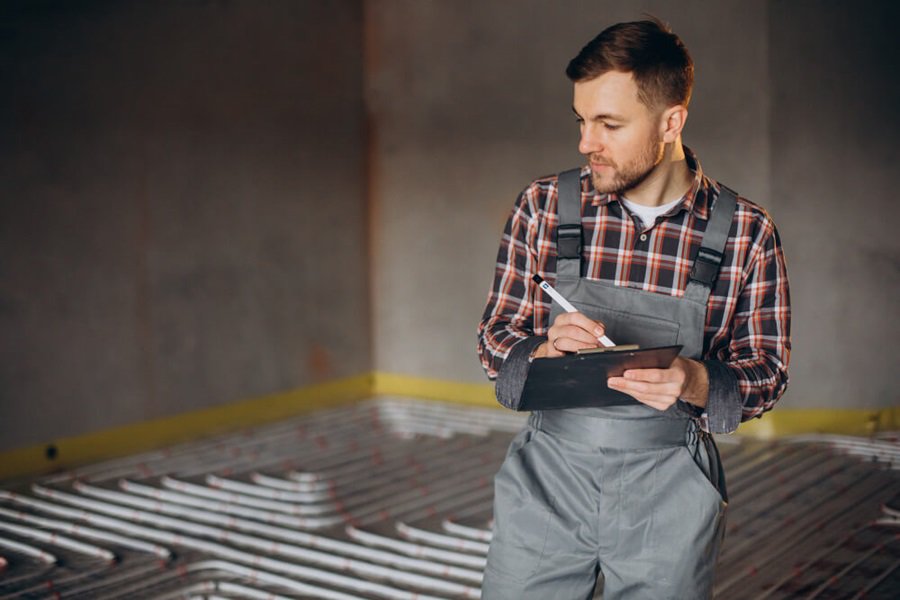
Tired of cold floors in the morning? DIY underfloor heating can surprisingly save you money on labour costs, but are you up to the challenge?
DIY underfloor heating is becoming more popular with homeowners who want better warmth and more space—without the need for radiators taking up valuable wall space. But before you dive in, there are a few things you need to know. In this article, we’ll walk you through what DIY underfloor heating involves, how to choose the right system, and the steps to get it working safely and efficiently—plus when to call in a pro to help finish the job.
Key Points:
- Grasp the distinctions between electric and hydronic under-floor heating systems
- Gather the essential tools and supplies before you begin the job
- Follow a clear, step-by-step guide to laying an electric UFH mat
- Know when it’s wise to call in a qualified plumber or electrician
- Pick up tips for testing, insulating, and running your system efficiently
- What You’ll Need For Underfloor Heating DIY
- How Underfloor Heating Works
- Wet Underfloor Heating Systems
- Electric Underfloor Heating
- Why Underfloor Heating Beats Radiators
- Plan Your System Before You Buy
- Think About Thermal Mass
- Zoning and Manifold Placement
- DIY or Call a Pro?
- How To Do DIY Underfloor Heating
- 1. Prepare the Subfloor
- 2. Mark Out No-Heat Zones
- 3. Test Before You Lay – First Check
- 4. Roll Out the Heating Mat
- 5. Secure Any Loose Cables
- 6. Second Round of Checks
- 7. Fit the Floor Sensor
- 8. Secure the Mat Properly
- 9. Add a Spare Sensor
- 10. Final Tests Before Switch-On
- 11. Safe Wiring and Professional Sign-Off
- Why Whole-House Insulation Matters
- 4 Smart Choices Before You Order a Kit
- Quick Recap To Finish
- FAQs
- Sources
What You’ll Need For Underfloor Heating DIY
Use this checklist before any diy underfloor heating job begins.
| UFH parts | Electric underfloor heating kit or water underfloor heating setup Underfloor heating insulation boards Conduits, floor sensor + spare sensor Thermostat & electrical back box Flexible tile adhesive Self-levelling compound Fixing tape |
| Standard tools | Wire cutters & strippers Scissors Sharp blade Screwdrivers Marker pen Electric meter Mixing bucket |
| Tiling kits | Large notched trowel Sponge Tile cutter Spacers/levellers Drill with mixing paddle |
How Underfloor Heating Works
If you were not already aware, there are primarily two forms of underfloor heating: wet and electric. Each of these operate quite similarly but also vary in terms of setup. Whilst you can learn more in our guide on how does underfloor heating work, here’s a quick breakdown of the systems available to purchase:
Wet Underfloor Heating Systems
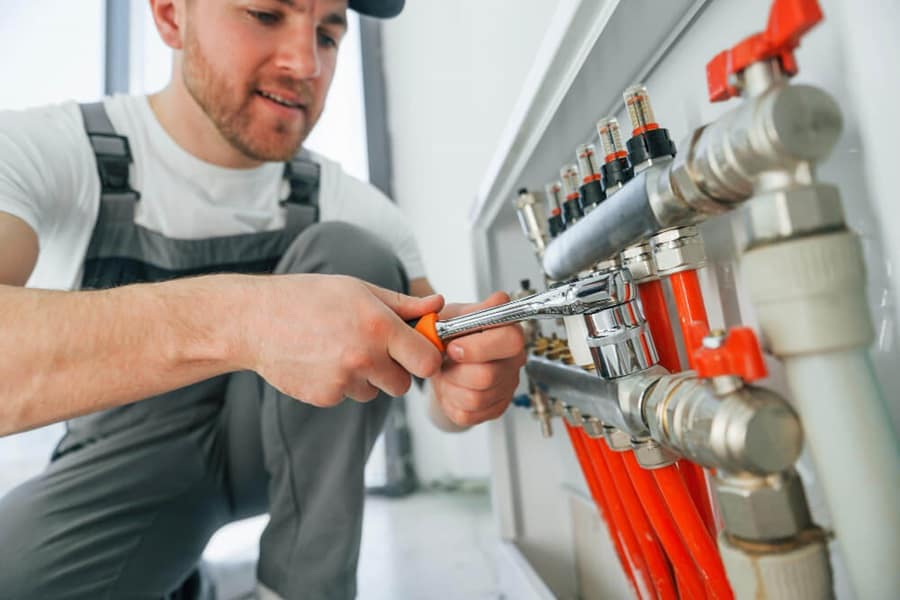
Low-temperature water (around 35 °C) flows through pipes set in about 70 mm of screed. The screed locks the pipework in place and spreads heat across the floor. A manifold mixes boiler or heat-pump water, then feeds each zone so rooms stay as warm as you set on their thermostats. Because such a large area radiates warmth, the boiler works easier than it would with radiators, helping you to cut down on energy bills. Shop water underfloor heating kits today.
Electric Underfloor Heating
Heater cables fixed to mesh replace pipes and link to the mains. Mats sit closer to tile or vinyl finishes and go down quickly, making them ideal for bathrooms or one-room updates. They’re faster to fit but usually cost more to run than wet kits.
Why Underfloor Heating Beats Radiators
Pipes or cables cover the whole floor, heating objects and walls as well as the air, so cold corners and spots disappear. Add proper insulation into the mix, located under the slab and your diy underfloor heating build will feel toasty without cranking the thermostat.
Plan Your System Before You Buy
Jumping straight into diy underfloor heating without a layout plan is a fast route to cold spots and other unpredictable malfunctions. Start by asking a heating engineer or UFH supplier to run a heat-loss calculation. They’ll look at insulation levels, window area, chosen floor finish and your heat source. Contact us today and see how we can help.
We can also assist in:
- Pipe or cable spacing and length
- Flow temperature (around 35 °C for water loops)
- Manifold size and port count
- Estimated running costs
Good design means your floor reaches set temperature quickly and runs at minimum cost.
Think About Thermal Mass
Most wet underfloor heating systems sit in 50–75 mm of screed. The screed stores warmth, so water can circulate at a lower temperature than radiators. Go thinner than 50mm and the floor warms fast but loses heat just as quickly; much thicker and it reacts slowly. Electric mats, by contrast, sit closer to the finish layer, giving near-instant heat but higher energy bills. Pick the type that suits the room: wet for large open-plan areas and whole-house builds, electric for bathrooms or small retrofits.
Zoning and Manifold Placement
A manifold is the hub that feeds every pipe loop. Each room is usually one loop, though a big kitchen-diner may need two. Keep the manifold as central as you can—often under the stairs or in a utility—so each circuit is roughly the same length.
Fewer long runs mean easier balancing and quicker heat-up. Small projects might need a two-port manifold; a full ground floor could use up to 12 ports. Homes with several storeys sometimes use one manifold per level.
DIY or Call a Pro?
Laying pipes or mats is well within reach of an experienced underfloor heating diy enthusiast, but final connections are a job for a plumber or electrician. Their sign-off protects your warranty and confirms the system is leak-free and wired safely—worth factoring into your timeline and budget.
How To Do DIY Underfloor Heating
Still interested in doing underfloor heating yourself? Here’s a simple step by step guide on how to do so:
1. Prepare the Subfloor
Getting the base right is the first win in any diy underfloor heating project, so it is important that you get it right the first time. For instance:
- Timber upstairs? Use coated insulation boards.
- Concrete downstairs? Switch to uncoated boards.
Both boards boost system efficiency by up to 50%, so heat reaches your toes faster and costs less to run.
Sweep or vacuum the floor, check its level, then stick perimeter insulation foam around the walls.
Lay boards in a brick pattern, trim with a craft knife, and fix every 300 mm with screws and washers.
Mesh tape over joints helps tile adhesive grip later.
2. Mark Out No-Heat Zones
Before cables go down, outline any obstacle that might obstruct your heating system. For example, if installing bathroom underfloor heating, mark out any toilets, baths, or vanity units with masking tape. Heating under fixed furniture traps warmth and can make the floor finish fail—known as thermal blocking. A quick trace now saves headaches later.
3. Test Before You Lay – First Check
For an electric underfloor heating kit, a multimeter will come equipped with it. Open the box and grab the multimeter. This primary test will ensure that the system performs efficiently prior to switch on:
- Resistance test – live to neutral; reading should sit within –5 to +10 percent of the figure in the manual.
- Insulation test – live and neutral to earth at 500 V; meter should show > 999 MΩ.
- Floor-sensor check – probe should read roughly 10 kΩ at 25 °C (expect 8–12 kΩ).
Log every result; you’ll need them for the warranty. Testing now means no surprises once tiles or other flooring styles are added down.
4. Roll Out the Heating Mat
Start near the thermostat wall. Unroll the mesh until you hit a wall or obstacle, then snip the mesh (never the cable) with scissors, rotate, and keep going. Flip the mat over when needed so cables always run wire-side down.
Work around the taped no-heat zones until the whole floor is covered. In tight spots, cut the mesh into strips or peel the cable from the backing to snake it through narrow gaps.
5. Secure Any Loose Cables
Loose sections must sit at least 50mm apart. Avoid crossing wires and skip regular fixing tape—it traps air and overheats. Instead, use fiberglass mesh tape to pin cables gently, shift any protruding screws, and drop spare mesh over exposed lengths for protection.
6. Second Round of Checks
With the mesh laid, run test number two. Grab your multimeter again and repeat both resistance and insulation checks on the mat. Any nicked wire picked up now saves you ripping up tiles later—an extra five minutes that every diy underfloor heating fan will be glad they took.
7. Fit the Floor Sensor
A sensor in the floor controls surface temperature and keeps timber or vinyl finishes safe.
- Drill a small hole below the thermostat back box.
- Push conduit through, then slide the probe in until it touches the floor.
- Cut a shallow channel in the insulation boards so the conduit sits flush and reaches the centre of a cable loop.
- Tape the conduit down with mesh tape (never across the heating cable).
- Feed the cold tail up to the back box ready for wiring.
- Avoid pushing joints into the wall; they need tile adhesive around them to stay cool.
8. Secure the Mat Properly
Peel off the backing and press the mesh hard to stop it lifting. End terminations must be buried in adhesive or levelling compound, so don’t smother them with standard tape—use fibreglass mesh tape instead, which lets compound pass through.
9. Add a Spare Sensor
An underfloor heating sensor can last for years but can be quite costly, so drop in a spare. Lay it midway between two cables, secure with mesh tape and label the tails. If the first probe ever fails, swap wires at the thermostat—no floor lifting needed. Learn more about underfloor heating probe installation.
Tile or Self-Level
- Direct tiling: Trowel adhesive through the mesh, back-butter tiles, and bed them firmly so every cable is covered.
- Levelling first: Pour compound to hide cables and joints, wait for it to cure, then tile as normal. Either route works for underfloor heating DIY; choose the one that suits your schedule.
10. Final Tests Before Switch-On
Once adhesive or compound is dry, complete the third and last set of readings:
- Mat resistance
- Mat insulation
- Main and spare sensor resistance
11. Safe Wiring and Professional Sign-Off
Even the most confident diy underfloor heating fan should leave final connections to a qualified electrician. At the back box you’ll see four pairs of tails:
- Spare sensor – terminate and park in a block.
- Earths – join supply and cold-tail earths together.
- Floor sensor – clip into the labelled sensor terminals (polarity doesn’t matter).
- Heating live/neutral – land on the thermostat’s output side; supply live/neutral on the input side.
Tighten each screw until no copper is visible, fix the thermostat to the box, and click on the fascia. That’s the electrical side of your underfloor heating diy job wrapped up.
Commissioning: Slow and Steady Wins
Resist the urge to test the warmth of your underfloor heating system straight away. Adhesive and self-levellers need time to cure or moisture can flash-boil and crack tiles. Most products ask for 7–14 days; always check the instruction booklet.
Commissioning schedule
| Day | Action Required |
| 0 | Power to thermostat, select “floor sensor” mode |
| 0-1 | Limit floor to 27 °C, leave heating switched off |
| 1-More | After 24 h, raise set-point by 2 °C per day until room hits target |
This gentle ramp lets any leftover moisture leave the screed without shock.
Why Whole-House Insulation Matters
Underfloor heating runs at lower flow temps than radiators, so the building fabric must hold that warmth. Updated Building Regs already push new homes in the right direction, but for underfloor heating in old houses and properties, consider extra loft roll, cavity fill, or floor insulation. A good envelope means water temperatures under 40 °C are possible, trimming bills every year.
Beneath the pipes or cables, always fit insulation boards: they bounce heat up where you feel it instead of wasting it in the slab.
4 Smart Choices Before You Order a Kit
- Check the Heat Requirement: A glassy extension loses warmth faster than a snug utility room. Ask your supplier to do a heat-loss calculation check so the kit delivers enough watts per square metre.
- Buy Quality, Not Price: Cheap cable can fail inside the floor, and repair means lifting tiles. Mid-range branded kits usually give the best life-cycle value.
- Pick a Low-Profile Build-Up: Retrofitting? Look for low profile underfloor heating systems as thin as 15 mm so doors and skirting stay put.
- Bring in a Plumber for Final Hook-Up: You can lay pipes, clip boards, and pressure-test, but a registered plumber should connect the manifold and balance each loop. Their stamp keeps the warranty valid.
Quick Recap To Finish
- Leave wiring and boiler connections to the pros.
- Follow a slow start-up routine after curing.
- Good insulation below and above the floor boosts efficiency.
- Match kit output, profile, and weight to your project.
- A plumber’s final checks turn solid DIY work into a long-lasting heating upgrade.
Stick to these steps and your diy underfloor heating project will deliver warm floors and lower bills with none of the usual hiccups.
FAQs
Can I install underfloor heating on top of existing tiles?
Yes, but only with the right prep. You’ll need to ensure the tiles are clean, level, and secure. Then install insulation boards on top before laying the heating mat or pipe system. A low-profile kit is best for this setup to avoid too much floor height increase. Learn about the best tiles for underfloor heating.
Is underfloor heating suitable for all floor finishes?
Yes—UFH works with tile, stone, laminate, vinyl, and even carpet. However, each finish has its own limits. For example, carpet must be no thicker than 2.5 tog with underlay included, and timber floors may need temperature limiters.
Sources
GOV.UK. (2012) Building regulations approval. [online] Available at: https://www.gov.uk/building-regulations-approval [accessed 30/06/2025]