
Ever wondered why your floors feel solid underfoot, or why they don’t?
There are more layers to your flooring than you might expect. Subflooring makes up the main point of contact between the main surface which you walk on everyday, and the deeper structures of your house. In this article, we will do an in-depth analysis of what is a sub floor, subflooring networks, and how this information is important for those preparing a renovation or are about to install underfloor heating systems.
Key Points:
- Learn the different types of subflooring and what makes each unique.
- Explore how subfloors work with various floor coverings.
- Identify signs that your subfloor may need repairing or replacing.
- Discover practical tips for preparing and maintaining a subfloor.
- Understand the importance of subfloors in improving underfloor heating.
- What is a Subfloor?
- Types of Subfloor Materials
- What Are Joists?
- Choosing the Right Underlayment
- How To Determine The Thickness of Your Flooring
- Floor Covering
- Signs of Subfloor Trouble
- How To Prepare The Perfect Subfloor
- 1. Remove Existing Floor Coverings
- 2. Clear Out Old Skirtings
- 3. Address Subfloor Damage
- 4. Clean the Subfloor Surface
- 5. Moisture Testing
- 6. Fix Squeaky Areas
- 7. Ensure Levelness
- 8. Final Cleaning
- FAQs
- Sources
What is a Sub floor?
A subfloor forms a stable, solid base for the visible floor covering and any underlayments. It’s the fundamental layer that sits directly above the joists, offering the necessary support and stability to the layers above.
So, what is a sub floor exactly? Simply put, it’s the foundational platform which other flooring layers cannot survive without.
| Material | Position | Purpose | Necessary? |
| Floor Covering | 1 | Top layer | Yes |
| Underlayment | 2 | Optional buffer | No |
| Subfloor | 3 | Solid flat base | Yes |
| Joists | 4 | Main support structure | Yes |
Types of Subfloor Materials
Subfloors are typically made from materials such as plywood or oriented strand board (OSB). These materials are favoured for their strength and ability to withstand significant wear and tear. The thickness of these subfloors can vary, typically ranging from 19/32 inches to 1-1/8 inches, often featuring tongue-and-groove edges to prevent too much movement and ensure an overall smoother surface.
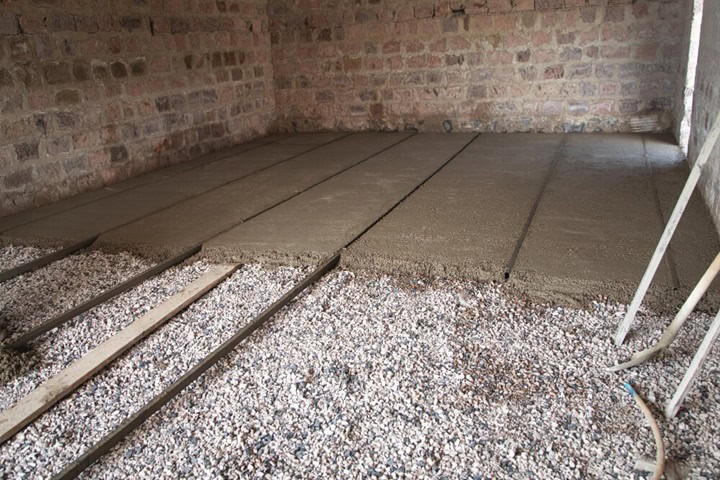
In homes with concrete foundations, the concept of a subfloor might seem less clear. Concrete can serve as a subfloor itself, especially in basements or on ground levels. However, it can also act as a base for a built-up subfloor system, which might include a layer of plywood or an uncoupling membrane, especially under ceramic tiles to prevent cracking.
Find out whether you have a concrete or timber subfloor
What Are Joists?
Joists, on the other hand, are the horizontal structures that support the subfloor; these are located below the subfloor and act as the main support system for each floor level. They are critical in maintaining the integrity and stability of the floor.
Made from materials such as engineered wood, dimensional lumber, or laminated wood, joists are typically spaced 16 inches apart, although variations can occur based on structural requirements and building codes.
Choosing the Right Underlayment
Underlayment, however, is an optional layer that sits between the subfloor and the floor covering. It has multiple purposes which can benefit towards the overall stability and heat transmission of the floor: it can provide additional insulation, reduce noise, and create a smoother surface for the floor covering.
Types of underlayment vary depending on the flooring type:
- Wood: A thin plywood layer can help smooth out an uneven subfloor for hardwood floors.
- Tile: A cement backer board is often used under tile to provide a rigid, moisture-resistant surface.
- Laminate: Foam or felt underlayment is common under laminate floors to improve comfort and reduce sound transmission.
How To Determine The Thickness of Your Flooring
To ensure your flooring is suitable and stable, it’s crucial to understand the layers that comprise it. Whether you’re considering renovations or simply curious about your current setup, here’s how you can determine the types and thickness of your flooring:
- Floor Heating Vent Method: Start by removing a floor HVAC vent to peek into the structure of your floor. This opening can provide a clear cross-section view, informing you of the various layers from subflooring to finish.
- Staircase Check: At the top of a staircase, you might find an unfinished edge that allows you to measure the total thickness of your flooring. Even if the stairs are finished, a simple measurement from the top riser to the surface can give you further insight.
- Exploring Basements and Crawl Spaces: For homes with visible joists in the basement or crawl spaces, use a straight-edge or tape measure to measure the distance between the subfloor panels, revealing the layering and potential spaces that may affect stability.
- Unfinished Areas: In spaces like closets or pantries without baseboard moulding, you can place a straight edge along the wall and slide it down to the subfloor, measuring the thickness of both the floor covering and any underlayments.
Floor Covering
The floor covering is what you see and walk on, like hardwood, laminate, vinyl, or tile. This layer is not structural but decorative and functional, providing the aesthetic appeal and surface durability for daily use.
It’s important to remember that no matter the type of floor covering, a solid subfloor is necessary to support and extend the life of the topmost layer.
Signs of Subfloor Trouble
Maintaining the integrity of your subfloor is essential for the longevity of your flooring. Here are some signs that might indicate the need for a subfloor inspection or replacement:
- Musty Smells: A persistent musty or damp odour can indicate moisture issues within the subfloor, potentially leading to structural weakness.
- Leaking Ceiling Indicators: If you notice leakage from the ceiling, it may suggest that moisture has penetrated through to your subfloor. Such situations require immediate assessment to prevent long-term damage to the structural integrity of your home.
- Visible Damage on Floor Covering: Signs like bubbling vinyl, separating laminate, cracking tiles, or bowing hardwood floors are clear indicators of subfloor issues. These symptoms suggest that the subfloor may be weakened or exposed to moisture.
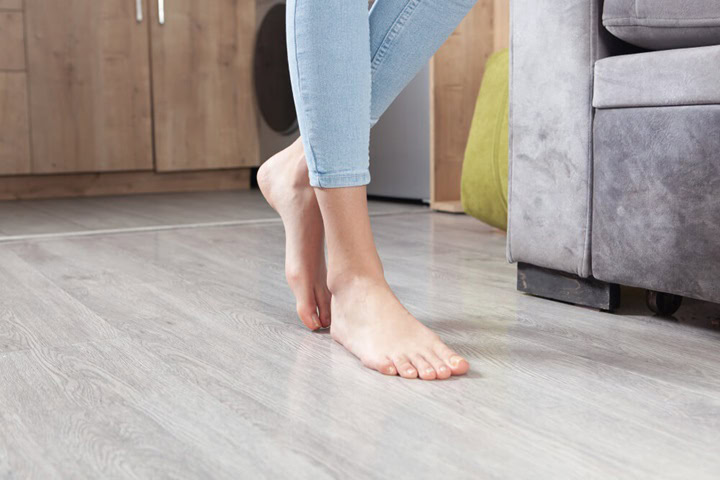
- Squeaky Floors: While not always indicative of a serious problem, squeaky floors can suggest loose subflooring or issues with the joists beneath. This is particularly common with plywood subfloors under laminate or engineered wood.
How To Prepare The Perfect Subfloor
Here are the steps you should follow to achieve an ideal subfloor that supports any type of flooring, from hardwood to laminate and more.
1. Remove Existing Floor Coverings
The first step in subfloor preparation involves removing old floor coverings.
This includes taking up carpets, vinyl, laminate, or hardwood to expose the underlying subfloor. It’s important to use the right tools, such as a utility knife, pry bar, or flooring scraper, to carefully lift the old materials without damaging the subfloor beneath.
This step will allow you to check for any underlying damage as well as checking that the new floor remains flat and intact.
2. Clear Out Old Skirtings
Floor skirtings or baseboards should be removed to provide a clean edge for new flooring installation. By using a suitable knife or pry bar, gently remove the skirtings without damaging the walls.
This access also makes it easier to address any issues near the walls, like gaps or uneven subfloor sections, ensuring a more polished look once the new floor is installed.
3. Address Subfloor Damage
Examine the subfloor for any signs of damage, including rot, fractures, or unsecured boards. Replace damaged sections with new material and secure any loose boards with screws or nails to ensure they are flush and stable.
Addressing these issues is vital for preventing uneven surfaces and potential movement of the new flooring.
4. Clean the Subfloor Surface
Before installing new flooring, it is essential to remove all grease, residue, glue, or stray nails from the subfloor. Use a scraper or adhesive remover to clean the surface thoroughly.
For any grease or oil stains, apply a degreaser to ensure the subfloor is completely clean. This step is important for a smooth installation and to prevent any imperfections in the new flooring.
5. Moisture Testing
Check the moisture content of the subfloor, especially if you are installing wood or other moisture-sensitive materials. Use a moisture meter to ensure the levels are appropriate for your specific type of flooring.
Excessive moisture can cause warping or mould growth, so it’s important to address any moisture issues before proceeding.
6. Fix Squeaky Areas
Squeaky floors can be a sign of loose subfloors. Locate the source of any squeaks and secure the area by screwing the subfloor down to the joists.
This step not only reduces noise but also strengthens the overall stability of the flooring.
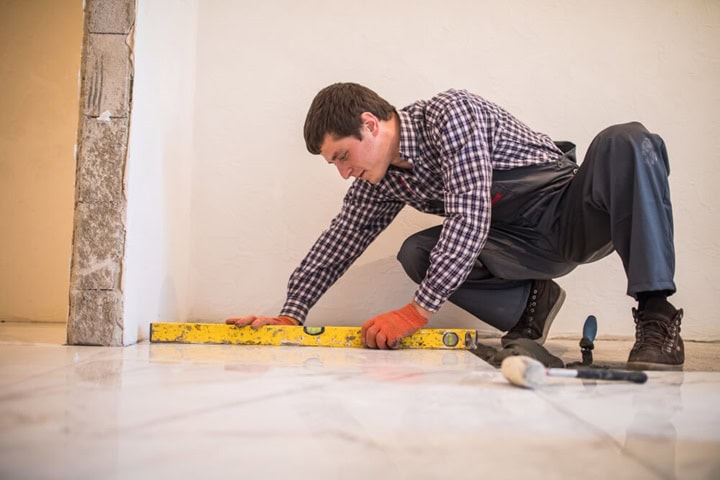
7. Ensure Levelness
Use a straightedge or spirit level to check for levelness across the subfloor. Any high or low spots can be corrected using a flooring adhesive to ensure a flat surface for your new flooring.
This is crucial to avoid gaps and ridges that can affect both the appearance and performance of the final floor.
8. Final Cleaning
The last step before installing is a thorough cleaning of the subfloor. Ensure all dust, debris, and remaining particles are removed.
A clean subfloor guarantees better adhesion of the new floor and helps avoid any potential bumps or unevenness.
In conclusion, a well-prepared subfloor is important to a successful flooring installation. By carefully removing old coverings, addressing any damage, and ensuring a clean, level surface, you can create a solid base that improves the durability and appearance of your new floor.
Remember, taking the time to properly prepare your subfloor not only prevents future issues but also ensures a stable and beautiful flooring surface that will last for years so that, in colder months, you can install a water underfloor heating system (or electric) with little hassle.
Further reading:
Here is some additional reading for you to consider when it comes to subfloors and underfloor heating:
FAQs
What is the importance of a well-prepared subfloor?
A well-prepared subfloor ensures a stable, even surface, which is crucial for the proper installation and longevity of the flooring material.
How can I ensure my subfloor is structurally sound?
Inspect for any signs of damage, such as cracks or rot, ensure the joists are intact, and check for any squeaks or movement that could indicate issues.
Sources
Naturally Wood. (2024) Oriented strand board (OSB). [online] Available at: https://www.naturallywood.com/products/oriented-strand-board-osb/ [accessed 04/04/2025]
Birmingham Floors. (2024) How To Find Out What Subfloor I Have Concrete Or Timber? [online] Available at: https://www.birminghamfloors.co.uk/2023/10/12/find-subfloor-i-concrete-timber/ [accessed 04/04/2025]