
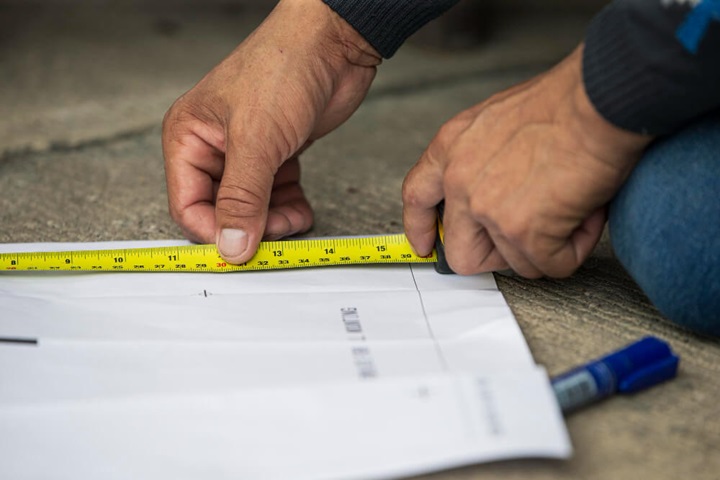
No one wants cold spots, high bills, or wasted effort. When it comes to underfloor heating, the design makes all the difference.
Designing underfloor heating isn’t just about laying pipes or cables correctly —it’s about making sure your system fits the room, the flooring, and the way you use the space. In this article, we’ll walk you through the full underfloor heating design process, including layout planning, floor construction, heat output, insulation, and thermostat placement. Whether it’s a new build or retrofit, good design means comfort that lasts.
Key Points:
- Design your own underfloor heating system based on room size, layout, and floor type
- Find out how insulation works and why they matter for efficiency
- Discover the right floor construction for underfloor heating systems
- See how pipe or cable spacing affects heat output and comfort
- Find out where to place thermostats and manifolds for best results
- How to Design Underfloor Heating: What to Plan First
- Concrete Floors
- Timber Suspended Floors
- Floor Finishes and Compatibility
- Insulation and Regulations
- Boiler Compatibility and Heating Sources
- The Cost of Designing and Installing Underfloor Heating
- Wet or Electric Underfloor Heating
- Extra Heating for Bathrooms and Small Rooms
- Planning for Maintenance: Isolating Valves
- Risks of Poor Underfloor Heating Design
- What a Good Underfloor Heating Design Includes
- 1. Calculate Room-by-Room Heat Loss
- 2. Set the Right Heat Output
- 3. Build the Underfloor Heating Layout
- Work With Us To Design Your Underfloor Heating
- FAQs
- Sources
How to Design Underfloor Heating: What to Plan First
Before pipes or cables go down, a proper underfloor heating plan needs to be created. Getting the design right from the beginning ensures the system works as expected and avoids expensive mistakes later.
A good underfloor heating design takes into account:
- Room size and layout
- Insulation levels
- Floor type and build-up
- Heat loss calculations
- Pipe or cable spacing
- Thermostat and manifold positions
Let’s break each of these areas down so you can understand how to design underfloor heating step-by-step.
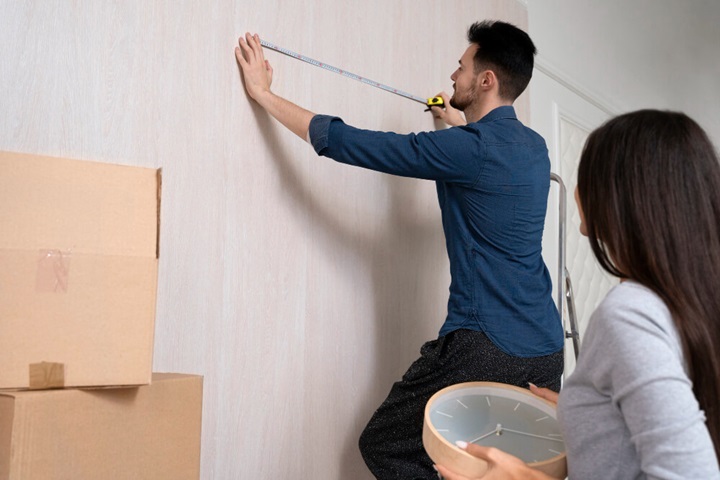
1. Room Dimensions and Heat Loss Calculations
Each room is different—some are open-plan, others are small or shaped awkwardly.
The first step in designing underfloor heating is to calculate the heat loss for each room individually. This involves looking at the room’s size, insulation levels, number of windows, ceiling height, and what the space is used for.
Heat loss affects how much heat the system needs to supply. If heat loss is higher than what the floor can deliver, the room won’t warm up properly. That’s why this stage is so important.
As a guide:
- Concrete floors can supply up to 100 W/m²
- Timber suspended floors can supply up to 70 W/m²
No room should lose more heat than these maximums. If it does, extra insulation or a different heat source may be needed.
Follow these guides for laying underfloor heating on floor types:
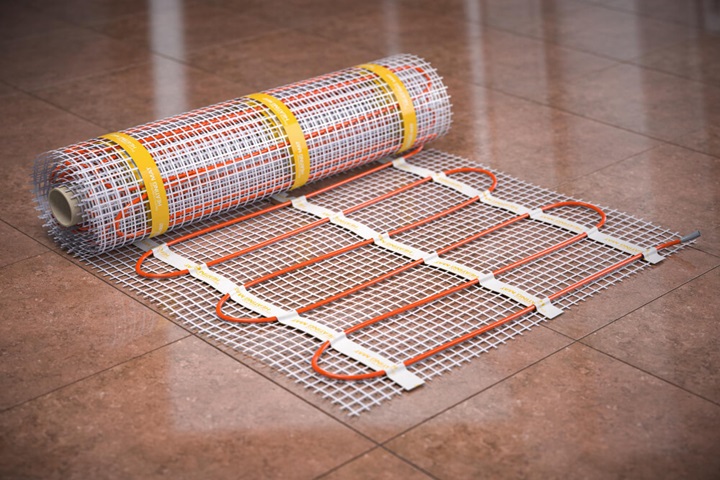
2. Underfloor Heating Layout and Pipe Spacing
Once the heat loss figures are identified, the underfloor heating layout can be planned.
The most common layout uses pipes spaced at 200mm centres, although this can be adjusted depending on the heat output required. In high heat-loss areas, closer pipe spacing may be needed.
There are two main pipe layout patterns:
- Serpentine: easy to install, ideal for even coverage
- Spiral: gives a more balanced heat distribution, better for larger areas
An accurate underfloor heating planner will help map out where the pipes or cables should go, how many loops are needed, and where each loop starts and ends. It’s also used to calculate the total pipe length and choose the right manifold location. Follow up on underfloor heating pipe spacing.
3. Floor Construction for Underfloor Heating
The type of floor you have will affect both installation and performance. Here’s what to consider for common setups:
Concrete Floors
Use at least 50mm of underfloor heating insulation boards. Be sure to also consider these factors when planning underfloor heating for concrete floors:
- Clip pipes directly to insulation
- Cover with a minimum 65mm of screed
- Allow screed to dry for 4–6 weeks before switching heating on
- Start heating at low temperature; raise by 2°C per day up to 45°C
- Use a plastic membrane over insulation if using liquid or fibre screed
- Always use edging strip around the walls
Timber Suspended Floors
- Also use 50mm insulation between joists or over boards
- Floorboards should be below 25mm thick and have less than 7% moisture content
Tip: Do not lay plastic sheeting over the pipework. This can trap air and reduce efficiency.
Floor Finishes and Compatibility
Once the screed is fully cured, you can lay your floor covering. Most types work well with underfloor heating, but some need extra care.
Best floor finishes for underfloor heating:
- Tiles and stone
- Thin engineered wood
- Vinyl (if heat-resistant)
- Carpet (must be less than 2.5 Tog combined with underlay)
Always check with the flooring manufacturer to ensure it can handle temperatures of up to 40°C. Avoid very thick materials that may trap heat and make the system inefficient.
Insulation and Regulations
Good insulation helps keep heat in the room rather than letting it escape through the floor. That’s why building regulations require a minimum level of insulation for all underfloor heating projects.
For most jobs, 50mm Polyurethane insulation is a reliable standard. It’s suitable for both screeded and suspended timber floors. Without proper insulation, even the best underfloor heating system will struggle.
Boiler Compatibility and Heating Sources
Condensing boilers work well with underfloor heating as they operate efficiently at lower temperatures. If using a combi boiler, check the manufacturer’s instructions to confirm whether a secondary pump is needed.
You can also run radiators alongside underfloor heating, but they must be set up as separate circuits. Use two-port valves and return both systems all the way back to the boiler—similar to an S-Plan system. It is also possible to combine underfloor heating and radiators together.
Explore Underfloor Heating Kits
The Cost of Designing and Installing Underfloor Heating
Whether you’re starting from scratch or upgrading an old system, understanding the cost of underfloor heating construction is a key part of the planning stage. Prices will vary based on the size of your project, the type of system you choose, and the state of the property.
Wet or Electric Underfloor Heating
Wet underfloor heating systems are generally more expensive to install but are cheaper to run over time. Electric systems cost less upfront and are quicker to fit—ideal for smaller rooms or renovations.
Typical installation costs:
| System Type | New Build (£/m²) | Renovation (£/m²) |
| Electric | £50-75 | £60-85 |
| Wet | £90-135 | £135-£185 |
- Overall system cost: Between £500 and £8,000, depending on the size of the area and the system selected. Of course, costs can change over time, and depending on room size and type of underfloor heating system, these are liable to change. Contact us today to see how much does underfloor heating cost for your bespoke project.
- Wet underfloor heating kits are better suited for larger spaces and whole-home heating. Electric underfloor heating kits are more cost-effective for single rooms like bathrooms or kitchens.
Extra Heating for Bathrooms and Small Rooms
Bathrooms and toilets tend to have less floor space and more heat loss due to tiles and ventilation. In these cases, it’s standard practice to combine underfloor heating with towel rails. This gives an extra boost and helps dry the room faster.
Planning for Maintenance: Isolating Valves
When setting up your underfloor heating plan, it’s worth thinking about the long term. We recommend your plumber install ball valves before the mixing valve. These isolating valves make it much easier to service the pump or valve later on without draining the whole system.
Risks of Poor Underfloor Heating Design
Getting your underfloor heating layout wrong can lead to years of poor performance and higher running costs
Once your underfloor heating is installed, it’s buried under your flooring—meaning it’s very difficult to change later. That’s why designing underfloor heating properly from the start is so important.
What can go wrong with bad design:
- Rooms that never reach a comfortable temperature
- Cold patches in the floor
- Higher energy bills due to inefficiency
- Damage to floors caused by overheating in spots
What a Good Underfloor Heating Design Includes
At its core, a good underfloor heating design comes down to three steps: understanding the space, matching the system output to the need, and creating an accurate underfloor heating planner or layout drawing.
1. Calculate Room-by-Room Heat Loss
Not all rooms are the same. A small utility room with no windows will lose heat differently than a large, glass-walled living room. This is why the first step in how to design underfloor heating is to calculate the heat loss for every room individually.
Factors to assess include:
- Wall, roof, and floor insulation
- Window size and type
- Ceiling height
- Ventilation rates
This data tells you how much heat each space will lose, and therefore, how much the heating system needs to supply.
Unsure if your walls need insulating? Heat can escape through them too.
2. Set the Right Heat Output
Once the heat loss is calculated, the next step is to make sure the system can meet that demand. That means choosing the right:
- Pipe or cable spacing
- Flow temperature
- Heat source (e.g. boiler or heat pump)
- Floor covering
If the project uses vinyl, carpet or timber flooring, this also needs to be factored into the heat output settings so materials aren’t damaged.
3. Build the Underfloor Heating Layout
The final stage is producing the actual underfloor heating layout. This includes:
- Pipe loop positions
- Total pipe length
- Coil spacing
- Manifold locations (ideally placed centrally)
Using an underfloor heating planner or CAD drawing makes installation far easier and ensures nothing is missed. A well-planned layout makes it possible for confident DIYers to install the system themselves—with professional commissioning support if needed.
Work With Us To Design Your Underfloor Heating
At Underfloor Heating Trade Supplies, we make designing underfloor heating easier with a full range of products to suit every project. Whether you’re working on a new build or a retrofit, our systems come with everything you need—from pipework and manifolds to thermostats and fixing clips.
Our kits are compatible with a wide range of floor types and heating sources, and we’re always on hand to offer advice on underfloor heating layout or system selection that works for your space.
FAQs
What temperature should I set for my underfloor heating?
Most people set their thermostat between 21–22°C for living spaces. The floor itself is usually heated to around 23–26°C. You can adjust it to suit your preferences using the room thermostat. Colder regions may need slightly higher settings.
Can I leave underfloor heating on all day?
Yes—especially in colder months. It’s more efficient to keep in-screed systems running at a low level, as the screed stores heat and maintains warmth without using constant energy.
Should I turn underfloor heating off in summer?
In summer, you can turn it off. Running it briefly every now and then helps keep the system in good working order. Read up on how to turn underfloor heating off.
Can underfloor heating be installed in older homes?
Yes, there are retrofit systems available for older properties, including options like castellated panels, chipboard systems, and low-profile boards.
How is underfloor heating different from radiators?
Radiators heat the air quickly at high temperatures. Underfloor heating works at lower water temperatures (around 50°C) and warms the whole floor evenly. It’s slower to heat up but more efficient and comfortable in the long run.
Sources
Energy Saving Trust. (2021) Solid wall insulation. [online] Available at: https://energysavingtrust.org.uk/advice/solid-wall-insulation/ [accessed 08/08/2025]