Electric Underfloor Heating Mat
An easy to lay, heating solution, consisting of a twin conductor heating cable attached to a self adhesive fibreglass mesh. The mat can simply be rolled out onto the floor, making installation quick and easy. The entire underside of the mat is fully adhesive, enabling them to be quickly and securely fixed to any clean surface.
-
![1m2 Novatherm Under Tile Electric Underfloor Mat Kit]()
-
![1.5m2 Novatherm Under Tile Electric Underfloor Mat]() 1.5m2 Novatherm Under Tile Electric Underfloor Mat
1.5m2 Novatherm Under Tile Electric Underfloor Mat Regular Price £43.14 Incl. Vat: Special Price £34.51 £28.76
 -
![2m2 Novatherm Under Tile Electric Underfloor Mat Kit]()
-
![2.5m2 Novatherm Under Tile Electric Underfloor Mat]()
-
![3m2 Novatherm Under Tile Electric Underfloor Mat]()
-
![4m2 Novatherm Under Tile Electric Underfloor Mat]()
-
![5m2 Electric underfloor heating 150w Sticky Mat kit]()
-
![6m2 Electric underfloor heating 150w Sticky Mat kit]()
-
![7m2 Electric underfloor heating 150w Sticky Mat kit]()
-
![8m2 Electric Underfloor Heating 150w Sticky Mat Kit]()
-
![9m2 Electric underfloor heating 150w Sticky Mat kit]()
-
![10m2 Electric underfloor heating 150w Sticky Mat]()


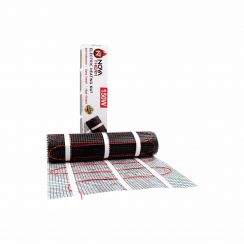


An easy to lay, heating solution, consisting of a twin conductor heating cable attached to a self adhesive fibreglass mesh. The mat can simply be rolled out onto the floor, making installation quick and easy. The entire underside of the mat is fully adhesive, enabling them to be quickly and securely fixed to any clean surface.

Shop By
Shopping Options
Featured

Heatmiser - 8 Zone 230V Wiring Centre
Regular Price
£85.80
Incl. Vat:
Special Price
£77.52
£64.60
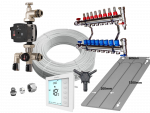
25MM Solid-Floor Tile Direct System - 20M2
Incl. Vat:
£834.00
£695.00

Grundfos Single Zone Pump
Regular Price
£282.00
Incl. Vat:
Special Price
£264.00
£220.00

Electrothermic Manifold Actuator
Incl. Vat:
£15.00
£12.50