
Homeowners are always looking for new ones to heat their homes at comfortable, affordable prices, and underfloor heating is the go-to choice for optimum heating efficiency. However, when testing underfloor heating, the end result can go different ways. In this article, we will teach you how to understand underfloor heating pressure, in order to conduct a precise pressure test. You will also learn what pressure your underfloor heating should be at, what to do when there is a pressure drop, and how to ensure that your chosen underfloor heating system performs at its prime.
- How To Pressure Test A Underfloor Heating System
- Underfloor Heating Pressure Loss Considerations
- Impact on Pump Performance
- Bleeding Underfloor Heating: Maintaining System Efficiency
- Venting the Underfloor Heating System
- After Bleeding: Check the Pressure
- Underfloor Heating Pressure Test Performed Correctly
- FAQs
- Sources
How To Pressure Test A Underfloor Heating System
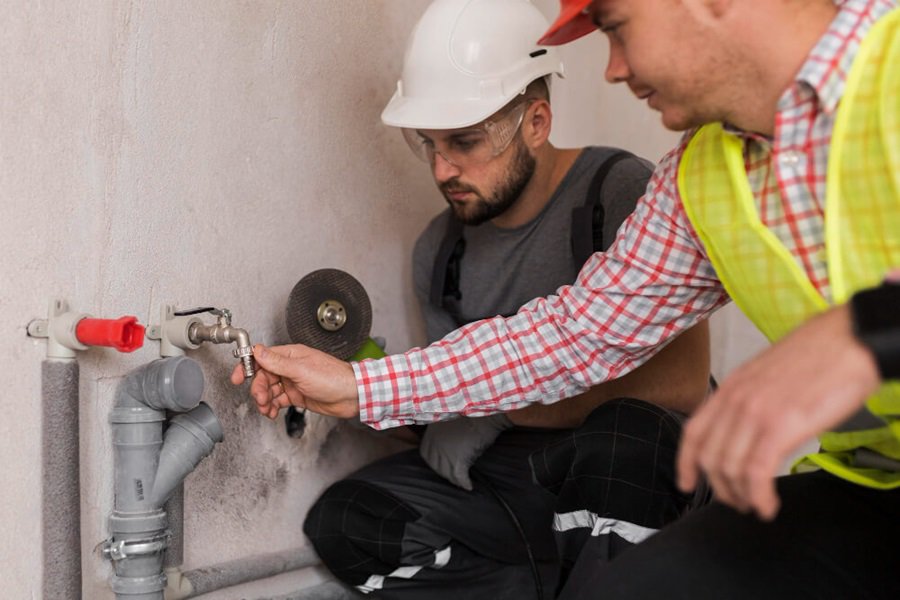
When it comes to the reliability of your underfloor heating system, pressure testing is imperative for it to perform correctly, in the same way that you may wonder about boiler pressure. It is always better to leave this work for the professionals, but if you feel confident enough to do this task yourself, then continue reading.
Recording Results for Warranty Validation
First and foremost, the results of the pressure test should be recorded on the appropriate form. A copy of this documentation is typically sent back to the manufacturer, as part of the warranty validation process. This step ensures that any potential issues with the system are addressed promptly and covered under warranty.
Testing Before Screeding
Pressure testing should occur before any screed or coverings are applied over the heating pipes. This ensures that any leaks or weaknesses in the system are identified and fixed before they become hidden beneath layers of flooring material.
Maintaining Pressure During Installation
Throughout the process of screeding and curing, the test pressure should be maintained. For systems without screed, you should keep the system under pressure while structural floor layers or finishes are applied. This prevents any accidental damage or stress on the system during construction.
Testing Entire System
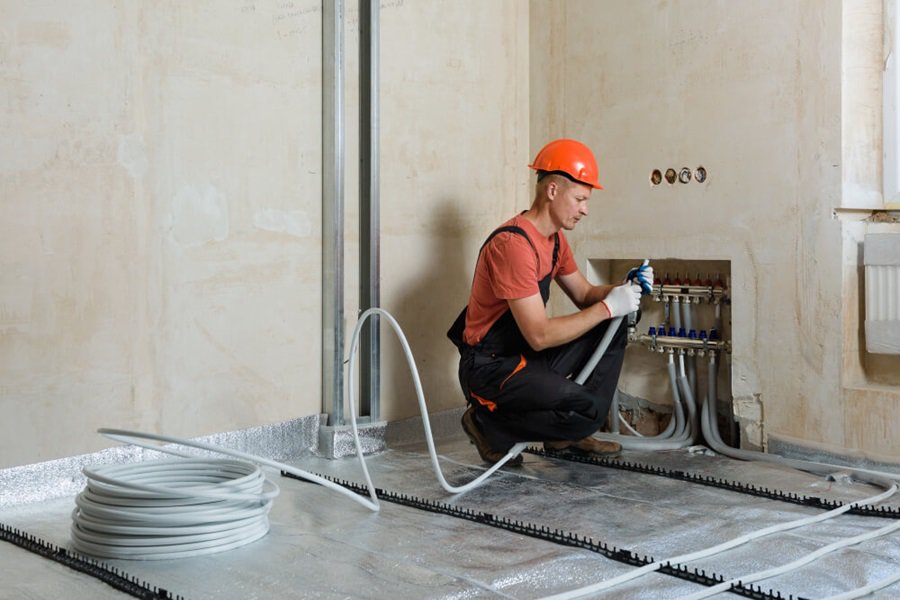
While separate circuits can be pressure tested if necessary, be sure to perform an initial test with all underfloor heating pipes connected to the manifold. No matter whether it is electric or water underfloor heating, the system should be fully filled and purged of air before conducting the test. Do not air test either of these systems yourself as a homeowner.
Antifreeze and Inhibitors
After a successful pressure test, replace plain water in the system (hydronic underfloor heating online) with an appropriate percentage of antifreeze/inhibitor. This safeguard helps prevent freezing and corrosion, prolonging the life of your underfloor heating system.
Taking these steps in underfloor heating pressure testing and system maintenance will ensure that your system operates properly.
- Prepare for Testing
To kick off the pressure testing process for your underfloor heating system, start by closing both primary isolation valves. This ensures that the system is isolated from the rest of the heating setup, allowing you to focus on testing its integrity.
- Configure the Manifold
Next, you’ll need to configure the manifold. If your manifold has caps or actuators/regulators on the lower return arm, remove them. Ensure that the circuit isolator valves and flow metres on the upper flow arm are fully open. Do this by turning the red collars anti-clockwise by hand until they are completely open. This step prepares the manifold for the pressure test.
- Connect the Pressure Test Pump
Now, it’s time to connect a pressure test pump to the filling/drain valve located on the upper flow arm of the manifold. Once the pump is securely connected, open the valve fully by turning it anticlockwise, using the square key on the cap. This allows you to control the flow of pressure into the system.
- Vent and Stabilise Pressure
Vent the system to eliminate any residual air, ensuring that you have a stable starting point. Afterward, increase the pressure within the system to 6 bars. Initially, allow for a 15-minute stabilisation period at this pressure. If the pressure drops during this time, increase it back to 6 bars and maintain it for an additional 45 minutes. This step helps identify any potential issues with the system’s integrity.
- Inspect for Leaks
If the pressure drops at any point during the test, inspect the pipework and manifold for possible leaks. You may need to perform pressure tests on individual circuits to pinpoint any damage to a specific pipe. Address and resolve any identified issues promptly, and repeat the pressure test to ensure system integrity.
- Record the Results
Once you have successfully maintained pressure consistently, record the results on the pressure test certificate. You should also have the test witnessed and certified by a third party. This documentation is essential for warranty validation and as proof of a properly conducted pressure test.
Underfloor Heating Pressure Loss Considerations
You also need to understand the permissible pressure loss per circuit, which is typically specified by the system’s designer. This figure, often around 20kPa, ensures that the system operates efficiently. Additionally, designers calculate pressure loss through various components such as the mixer valve, manifold, and isolators at the specified design flow rate, which is the total flow rate of all underfloor heating circuits combined.
Impact on Pump Performance
The cumulative pressure loss across these components can have a significant impact on pump performance. For instance, a 12-port manifold with a flow rate of 2l/min per circuit results in a total flow rate of 24l/min. If the pressure loss through the manifold and isolators is 11kPa and the thermostatic mixing valve contributes 55kPa, the total pressure loss equals 86kPa.
Installer Challenges
Installers must account for these pressure loss considerations, especially when working with manifolds exceeding 10 ports. In such cases, the integral pump supplied with the unit may struggle to provide sufficient heat to the heat emitter. Hiring an installer will also help for additional issues that the regular homeowner won’t pick up on, such as air in the system or improper UFH floor construction, highlighting the importance of a sound technical understanding and a common-sense approach when diagnosing problems.
The Whole Picture
To ensure a well-functioning underfloor heating system, installers should consider all aspects, including selecting the correct pump size and primary pipe size to feed the UFH manifold and pump station from the boiler. Everything, from system design to component selection, plays a crucial role in achieving optimal performance and efficiency in underfloor heating systems.
By following these pressure testing guidelines and considering pressure loss factors, you can maintain the reliability and performance of your underfloor heating system, ensuring warmth and comfort in your home.
Bleeding Underfloor Heating: Maintaining System Efficiency
Although we have previously discussed how to bleed underfloor heating, we still feel it necessary to give you a brief rundown of bleeding underfloor heating in the context of testing underfloor heating pressure.
Over time, air can become trapped in an underfloor heating system, which is one of the biggest concerns about problems with underfloor heating. Trapped air can lead to decreased efficiency. For this task, enquiring about our plumbing parts will help for any issues that you may come across. Here’s how to bleed your underfloor heating system and perform basic maintenance tasks to keep it running smoothly.
Venting the Underfloor Heating System
- Wait for System Filling: If your system is freshly filled with water, give it about 10 minutes to settle before proceeding with venting.
- Start at the Lower Section: Begin bleeding the pipes in the lower section of your home. This helps ensure that air is released at the highest point in the system.
- Isolate Troubled Areas: If only a portion of your underfloor heating system is malfunctioning, isolate that area before starting the bleeding process. Remove any actuators if present.
- Drain Individually: Using an Allen key, open each valve individually. Make sure only one valve is open at a time.
- Methodical Approach: Work methodically, moving from one valve to the next. Keep a towel or cloth nearby as water is likely to flow out of the valve during and after the bleeding process.
- Drain and Refill: Attach a hose connected to the cold tap to the flow valve and another hose to the drain. This setup allows you to drain off waste, flush out the pipes, and refill the system.
- Repeat as Needed: Continue the process until every valve has been vented, ensuring that trapped air is released from the system.
After Bleeding: Check the Pressure
After venting the system, wait a few minutes and then check the pressure gauge again. Bleeding the system typically causes the pressure to rise, and will restore the system to its original function. However, if the pressure remains low, seek further professional advice, as more complex issues may arise.
Basic Maintenance Tips for Underfloor Heating
Underfloor heating generally require minimal maintenance, but these tips can help ensure long-lasting efficiency:
1. Regular Pressure Checks:
Periodically check the system’s pressure to ensure it falls within the desired range. If the pressure is low, add water as needed.
2. Address Fluctuations:
If you notice pressure fluctuations or consistent issues with pressure levels, consult underfloor heating experts for guidance.
3. Detect Hot and Cold Spots:
Be vigilant for hot and cold spots in your space. If they persist, it’s a sign that your system may not be functioning optimally.
4. Call the Professionals:
While you can perform tasks like bleeding the system yourself, complex issues are best left to underfloor heating experts. If you’re unsure or suspect a more intricate problem, don’t hesitate to seek professional assistance.
Underfloor Heating Pressure Test Performed Correctly
Underfloor heating, with proper care, can have a long lasting life in your home with the right care. While these systems usually require less maintenance than other home heating systems such as radiators and boilers, there are still certain factors to bear in mind. The following information is also key to know if you are checking how often should get your central heating serviced:
- Regular Pressure Checks: Monitor your system’s pressure to maintain it within the desired range. Adding water when the pressure is low is a simple yet effective task that keeps your system running smoothly.
- Addressing Pressure Fluctuations: If you notice persistent pressure fluctuations or extreme variations, don’t hesitate to contact us today. We can diagnose and resolve complex issues that may affect your system’s performance.
- Detecting Hot and Cold Spots: Stay vigilant for any hot or cold spots in your space. Such irregularities could be indicative of a less-than-optimal system. Seek professional guidance if problems persist.
While undertaking straightforward tasks like bleeding the system can be within your reach, remember that complex issues are best left to underfloor heating specialists. If you’re uncertain or suspect intricate problems, contact us today.
FAQs
What flow rate should my underfloor heating pressure be?
The ideal flow rate for an underfloor heating system typically ranges between 2 to 3 liters per minute (l/min) per circuit. However, the specific flow rate can vary based on the size of the room, the type of underfloor heating system installed, and the heat output required. It’s essential to consult the manufacturer’s guidelines or work with a heating specialist to determine the optimal flow rate for a particular system.
Does an underfloor heating system need to be pressurised?
Yes, wet (or hydronic) underfloor heating systems need to be pressurised. These systems use a mixture of water and antifreeze to transfer heat from the boiler or heat source to the floor. The system must be pressurised to ensure that the water circulates effectively through the pipes, providing even heat distribution across the floor.
Why am I losing underfloor heating pressure?
There can be several reasons for an underfloor heating system to lose pressure:
Leaks: Even a small leak in the system can lead to a drop in pressure over time.
Air in the System: Air pockets or bubbles can reduce pressure and hinder effective circulation.
Faulty Pressure Relief Valve: If this valve is malfunctioning, it might release more water than necessary, leading to reduced pressure.
Expansion Vessel Issues: If the diaphragm in the expansion vessel is damaged, it can affect the system’s pressure.
Regular maintenance and checks can help identify and rectify pressure issues early on.
What setting should my underfloor heating pump be?
The setting for an underfloor heating pump will depend on the size of the area being heated, the specific requirements of the system, and the desired temperature. Most modern underfloor heating pumps are equipped with variable speed settings to adjust the flow rate as needed. For optimal efficiency and comfort:
Start at a medium setting and adjust based on the room’s heating needs.
Ensure that the system distributes heat evenly across the floor.
Monitor the system’s return temperature to ensure it’s within the recommended range.
It’s advisable to consult the pump’s manual or seek guidance from a heating specialist to determine the best setting for your system.
Sources
James, R., (2021) How Often Should I Have My Central Heating Serviced? Ignis Heating. [online] Available at: https://www.ignisheating.com/often-i-central-heating-serviced/ [accessed 16/10/23]