
Are you looking for an energy-efficient way of heating your home? Then underfloor heating might be the right solution for you. There are many things you need to know about underfloor heating. If you are interested in installing it yourself, we have the perfect underfloor heating installation guide to help, including relevant information such as, the types of underfloor heating, the planning, manifolding, and testing the kit upon completion.
This underfloor heating installation guide will explore the following:
Contents
What is underfloor heating?
If you are not already aware of the revolutionary feature of underfloor heating, here is what you need to know before we get into the details within this underfloor heating installation guide. It is a system that is installed under your flooring, whether it be carpet, vinyl, tiling or other forms of flooring. It contains the heating within your home, which also means you will not have to rely on your boiler and central heating system as often.
Types of underfloor heating
Before you begin installing your underfloor heating kit using this underfloor heating installation guide, you need to be aware of the variations of underfloor heating. These are wet (hydronic), and electric, and each one can span across small or large areas throughout your home to provide more efficient heating.
Electric underfloor heating can be activated with a flick of a switch, whereas hydronic heating needs time to warm up before it can begin heating your home.
Underfloor Heating Installation Guide: Step-by-step
Now that you have chosen your selected underfloor heating type, you can begin making the necessary preparations for installing it following the instructions in this underfloor heating installation guide, (each step in this guide will be split into two to separate the difference between installing electric and wet heating). You should follow this process:
1. How to clean the subfloor before beginning installation
Electric:
- Check that the subfloor is completely level and clean, which means breaking out the hover to clear off any dust and debris.
- Prepare the perimeter insulation foaming around the edges of the chosen room applied with a self-adhesive strip or double-sided tape.
- Begin laying down the insulation boards loosely.
- Cut the boards with a knife to fit the space.
- Measure the substrate to 300mm centres using screws and washers. Mesh tape can also be used to help with the adhesive sticking over the joints.
- After installing the concrete substrate, ensure everything is clean and level so that it is ready for tiling. Trowel off the tile adhesive to make a smooth layer of uncoated insulation boarding across the whole floor.
- Mark out any areas where there are permanent fixtures, such as pipes, toilets, or pedestals.
- Find out more about electric underfloor heating kits today and whether it is the right option for your flooring and heating.
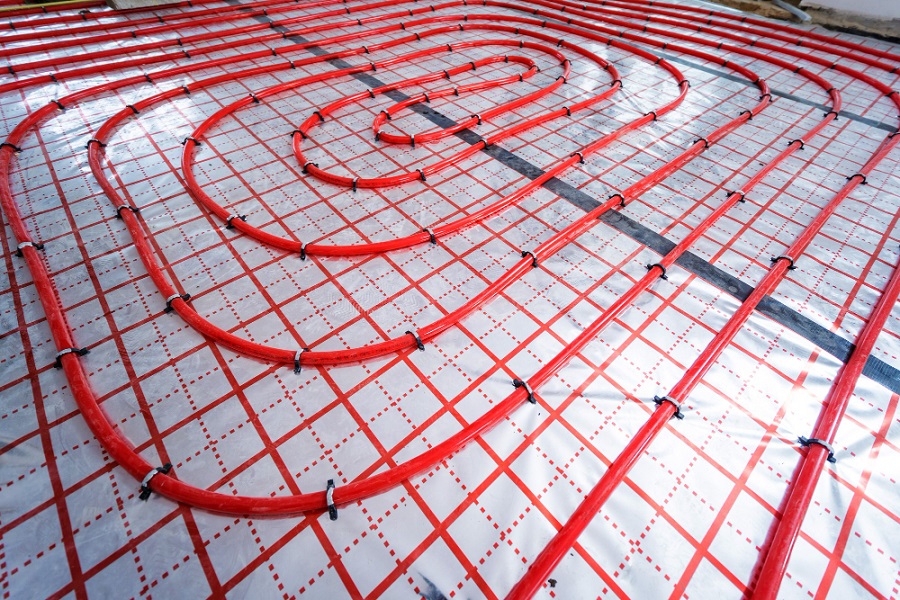
Water:
- Clean the subfloor before you begin installing the pipes for your wet underfloor heating system. Be aware of jagged edges that might damage the pipes and remove them first. A damp-proof membrane must be laid down before you add the installation layer.
- Fit the pipe across the set of units that help keep it in place. These are roughly 200-250mm spread apart, depending on the size and type of flooring. The maximum room length for the best results from water underfloor heating is 100-100m.
- Find out more about wet underfloor heating kits and whether this is the right heating system for you.
2. Wet Underfloor Heating: Installing Manifold
Electric:
- An electrician may be required to measure the mains connection to comply with the BS7671-2008 and IEE wiring regulations.
Water:
- A manifold is a unit from which the pipe loop will be connected within the chosen room and should be the first thing that is installed. Next, calculate the weight of the units and pipes that will be connected within this space.
3. Considering floor temperatures and final flooring
When performing your checks following the instructions in this underfloor heating installation guide, you should make sure that you constantly monitor the floor temperatures and how hot certain types of flooring is allowed to meet before it maximizes the set temperature. Follow the information below towards how to apply water and electric underfloor heating temperatures to your flooring.
Electric:
- You will need to test the heating mat using a sensible heat meter. Again, an electrician can do this for you, but three tests will need to be carried out to measure the readings.
- Testing heating mat: take out the mesh, turn on the test meter, and change the setting to ‘ohms.’ Connect the live to a terminal and the neutral to another terminal. Readings should be between -5 and +10% (more information can be found in the instruction manual). Keep a record of the part number and the readings from the manual for warranty registration purposes.
- Heating mat insulation: Turn on and set the insulation tester to 500V. Connect both the live and neutral wires to one terminal and the earth wire to a separate terminal. After testing, register the results; the expected results should be above 999 Megaohms reoccurring (infinity).
- Floor sensor resistance: Set the meter to ‘ohms’ and connect cables to the terminals. Readings will measure between 8 – 12k, variations in temperature. Monitor results and repeat the test for spare floor sensors.
Water:
- Certain floor covers will have a maximum temperature restriction in case of fire. For example, vinyl flooring, carpets, and wooden flooring allows for a limit of 27°c degrees; this applies to homes, the workplace, and other environments.
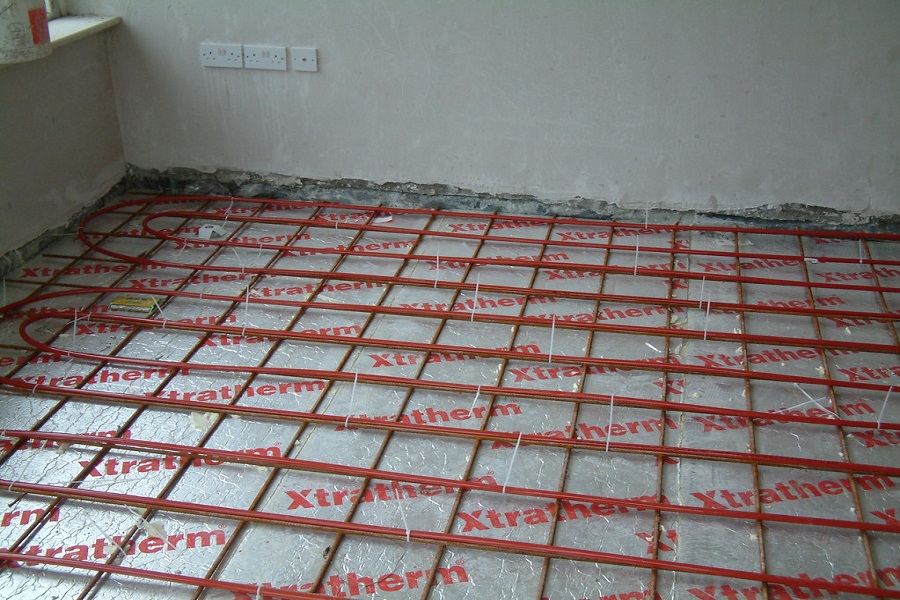
4. Underfloor Heating Installation Guide: Efficient Insulation
For electric and hydronic underfloor heating, installing insulation floor panels along with them will help store more heat. In the long term, the benefits include less warm-up time needed, and less money will be spent on energy bills and running costs.

- Planning and measuring
This is a method that will take time and precision to get right. Make sure that the follow the steps in this underfloor heating installation guide accordingly. First, you need to check what fixtures and fittings are required for the installation because each room will be different, such as bathrooms and kitchens. To minimise damage to the heating wiring, check for fixtures such as sinks and toilets. Even squeaky floorboards are a big obstacle, so get these fixed first.
- Testing underfloor heating
Regulate checking your underfloor heating system during all stages of the installation. If an electrician is helping you, you can ask them to do the testing throughout the process. This will help if there are any reoccurring problems and will save a lot more trouble than if you only carried out a test after installation is complete.
5. Additional tips
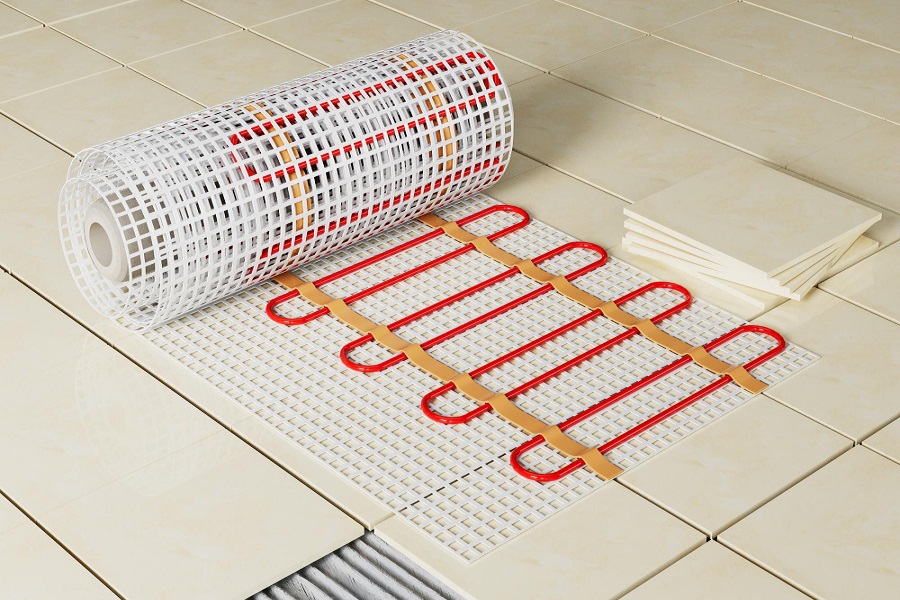
As you lay down your underfloor heating mat, we advice that you lay the mat with the wires facing down to the subfloor and the mesh facing up as this will bring more protection to the heating wire during the installation process.
Additionally, applying an self-levelling latex or flexible tile adhesive will aid the tile installation if the floor covering is tiled or ceramic.
Are you aware of the price differences between electric and wet underfloor heating?
Install your Underfloor Heating Safely
With careful precision, and having followed this underfloor heating installation guide, this process should be a breeze. Dry underfloor heating systems are simpler to install, although this relies heavily on monitoring electricity levels so it is better to get an electrician to help too.
Also, your building location can affect the heating results and which method might be preferable. New builds are better suited for hydronic heating, but it depends on how quickly you want your underfloor heating to operate.
FAQs
Is it expensive to install underfloor heating?
Depending on the type of underfloor heating that you want to install (electric or water), a professional can charge at least £25 per metre to help you with the installation. This can vary depending on your provider, so if you are concerned, then contact them first to see the options available.
Can I install underfloor heating myself?
Underfloor heating is not too difficult to install (as this guide has proven), and so long as you have some understanding of basic DIY skills, you can manage this task with ease. Installing underfloor heating yourself will also save you a lot of time in case you need to wait a couple of days for a professional to arrive after you have ripped the floor up.
Which is cheaper to run, electric or water underfloor heating?
At the moment, wet underfloor heating is cheaper to run than electric. One of the main reasons for this is because wet underfloor heating can take up a larger area than electric, and are very common in new build houses.
Why is my electric underfloor heating so expensive to run?
Electric underfloor heating currently costs at least three to four times more the amount than wet underfloor heating. This is due to electricity costing more than gas by each kWh.
Sources
Health and Safety Executive. (n.d.). Managing the risks from high and low temperatures in the workplace. Retrieved from: https://www.hse.gov.uk/temperature/employer/managing.htm
Institution of Engineering and Technology (IET). (2018). BS 7671 (IET Wiring Regulations). Retrieved from: https://electrical.theiet.org/bs-7671/
The Institution of Engineering and Technology (IET). (2018). Requirements for Electrical Installations: IET Wiring Regulations (BS 7671:2018). IET Standards. Retrieved from: https://www.amazon.co.uk/Requirements-Electrical-Installations-Regulations-Eighteenth/dp/1839532181