Underfloor Heating Design & Construction
Menu
Installing the Underfloor Heating – New Build
Screed Concrete Flooring
A screed concrete floor usually consists of a cement material made from a 1:3 or 1:4.5 ratio of cement to sharp sand; this may be applied over your underfloor heating system as a powdery mix (screed) that forms a solid slab. Less frequently, floating precast concrete sections are used. However, there are many variations on this, which will be explained later, but all should provide a level, smooth surface to lay your chosen flooring material on.
Concrete is a good conductor of heat, making it ideal for underfloor heating floor construction; the screed defuses the heat across the whole surface area, creating a consistent floor temperature, which spreads upwards filling the whole room. It is also slow to cool down, effectively working like a giant storage heater.
When installing underfloor heating, there are several procedures to follow, each one equally important to a successful final result.
Installing the Underfloor Heating – New Build
Underfloor heating loops should be installed when all external doors and windows have been installed and the home is watertight. This is to ensure that the installation is protected from weather damage, especially frost in the winter months.
Concrete floors:
Where underfloor heating is installed over a concrete floor (in-situ slab, precast plank or beam and block), the insulation layer is applied over the concrete and the pipe work is fixed on top of this. These are then embedded in a layer of screed (see below), which effectively heats up as one mass to transfer heat evenly through the floor finish.
Pipe work fixings should be carefully selected to maintain the integrity of the insulation and other materials. The use of foil-backed insulation can help address this risk.
The pipe work loops should be charged with water and pressurised before the screed is poured to ensure that the pipe work has no constrictions, or faults, as the screed sets.
Installing the Underfloor Heating – Retro Fitting
It is crucial to have an underfloor heating plan – this is both timesaving and cost efficient. Decide where the controls need to be situated for ease of use, and where the pipes will run through the joists. Your plan should include every zone, or area, even if the installation is being carried out zone by zone; this way, your whole system will link up and work efficiently.
Firstly, it is important to clean the sub floor of any debris, and remove any sharp irregularities; these could pierce the damp proof membrane, and ultimately, the pipes, which will be laid over the smooth and clean sub floor.
Insulation is laid next – if space allows, 20-50mm is the recommended underfloor heating insulation thickness;  however, with some of the recent developments in insulation technology, thinner layers of a modern insulation material can be equally efficient. This should be laid over the whole area up to the base of the walls, and continued up the walls, to a height that includes the depth of floor insulation and screed. Any gaps or joins should be taped to resist any seepage of the screed.
Some brands of insulation for underfloor heating are manufactured to include the pre-formed pipe work inlays, negating the need for another layer. This is, obviously, both timesaving and much easier to fit.
Always check your insulation material and depth complies with the current underfloor heating insulation regulations.
If your insulation does not have the preformed inlays, then the underfloor heating panels are laid now, and fixed to the insulation, leaving no gaps for the screed to infill. Some panels have a mesh covering to allow attachment of the pipe work, and with others, holes must be drilled and cable ties used to secure the pipes.
You are now ready to lay the underfloor heating pipe work, fittings and controls, and to thoroughly test the system before proceeding to lay the screed – this is obviously crucial!
It is important to note that the pipes must be filled with water before the screed is laid; this ensures that the pipes are not flattened by the screed layer, and also once the screed has cured, the pipes will have room to expand.
Types of Screed
Ready mixed screeds are becoming more and more popular; mixing it yourself requires a cement mixer, and huge amounts of manual labour, making it too costly and time consuming for most domestic installations.
Several types of screed are available, including fast drying cement screed, and to minimise any risk of cracking through expansion and contraction, a cement screed with the addition of polypropylene fibres, producing a reinforcing effect.
Ready mixed screeds are cost effective and often come with added retardants to delay the set, so that you can work all day with one load.
If you choose to use one of the proprietary brands of self levelling liquid screed, polythene sheeting should be laid over the underfloor heating pipe work, and extra seals installed over any joins, or gaps.
It is recommended that screed containing calcium silicate be avoided as this can react with the flooring adhesive used with your chosen floor material.
Laying the Screed
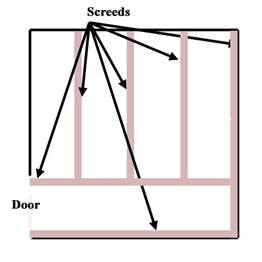
If it is a large area, timber battens will need to be laid, fixed, and checked for levelness; these allow for contraction and expansion of the concrete as the underfloor heating is in use, and make laying screed over a large area, easier.
It can help prevent any cracking as the screed cures, if the battens are wetted down before fixing in place; this prevents the rapid absorption of moisture from the screed, causing it to dry too quickly.
The underfloor heating screed depth should be 50mm-70mm, and, obviously, any battens need to reflect this, producing a completely level and smooth final finish.
Traditional screed is a semi dry, almost powdery mix, compared to regular cement mixes, and this should be spread over the area. But the process is similar if you chose a self levelling liquid screed.
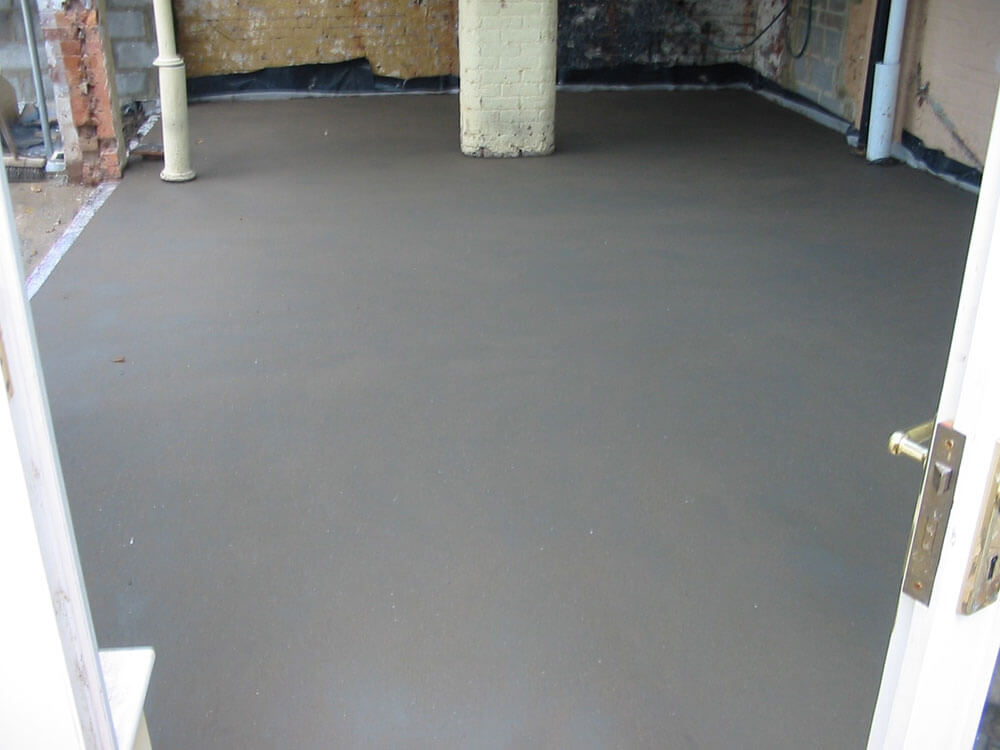
Once the screed is well compacted, using a float, and spirit level – do not rely on eye, it should be levelled and smoothed off using a trowel or powerfloat.
Allowing the Screed to Cure
Underfloor heating screeds should be cured rather than just dried out quickly. Curing means allowing it to dry slowly, retaining its moisture for as long as possible. This is necessary because of the high cement content and rapid drying could lead to cracks or patches that crumble. Place a polythene sheet over the screed and allow several days to cure before the surface is walked on.
If possible, the screed must be allowed to cure for a minimum of 4 weeks before the heating is operated. The first time a system is used, the mixing valve should be set to the minimum temperature in order that any moisture remaining in the screed dries out. Following this, the temperature should be increased by two degrees every day for approximately 2 weeks. This should prevent any cracks caused by rapid shrinkage.
Once the screed is completely cured, underlay and the floor surface can be laid – carpet, stone flags, tiles, laminate, or wood – the choice is yours!
Always check, though, with the flooring and adhesive manufacturers that the products chosen are suitable for use with underfloor heating.