F5 CRIMP SECTION INSTALLATION GUIDE
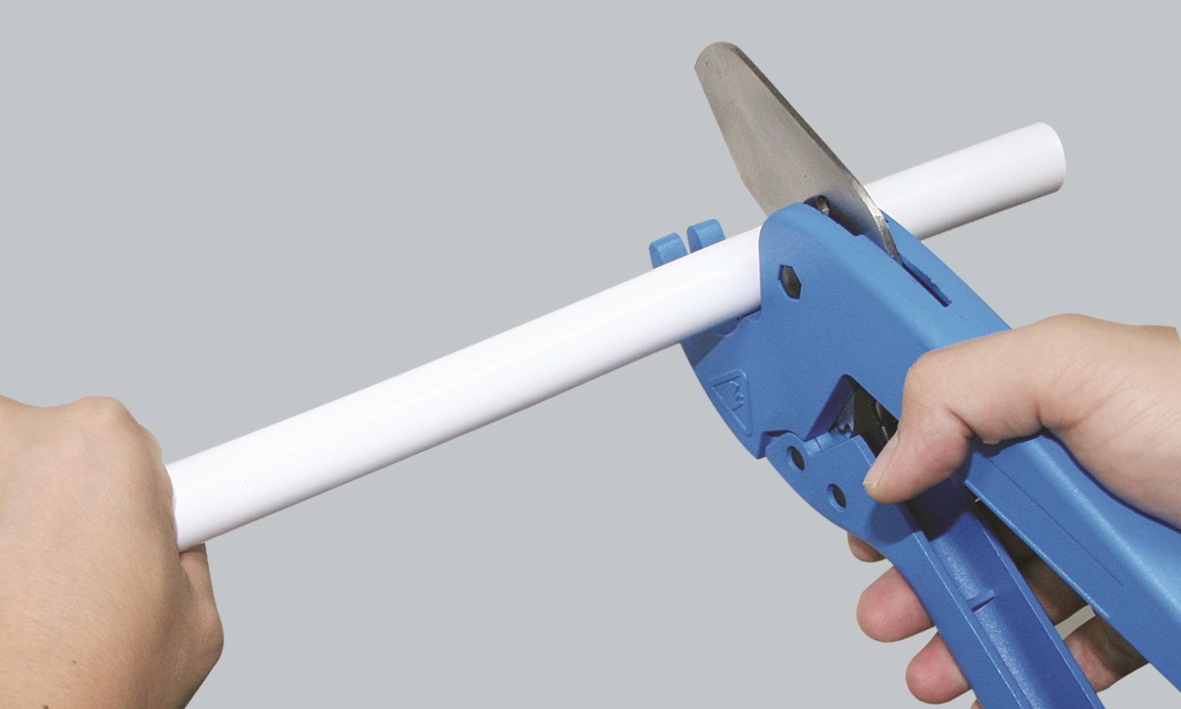
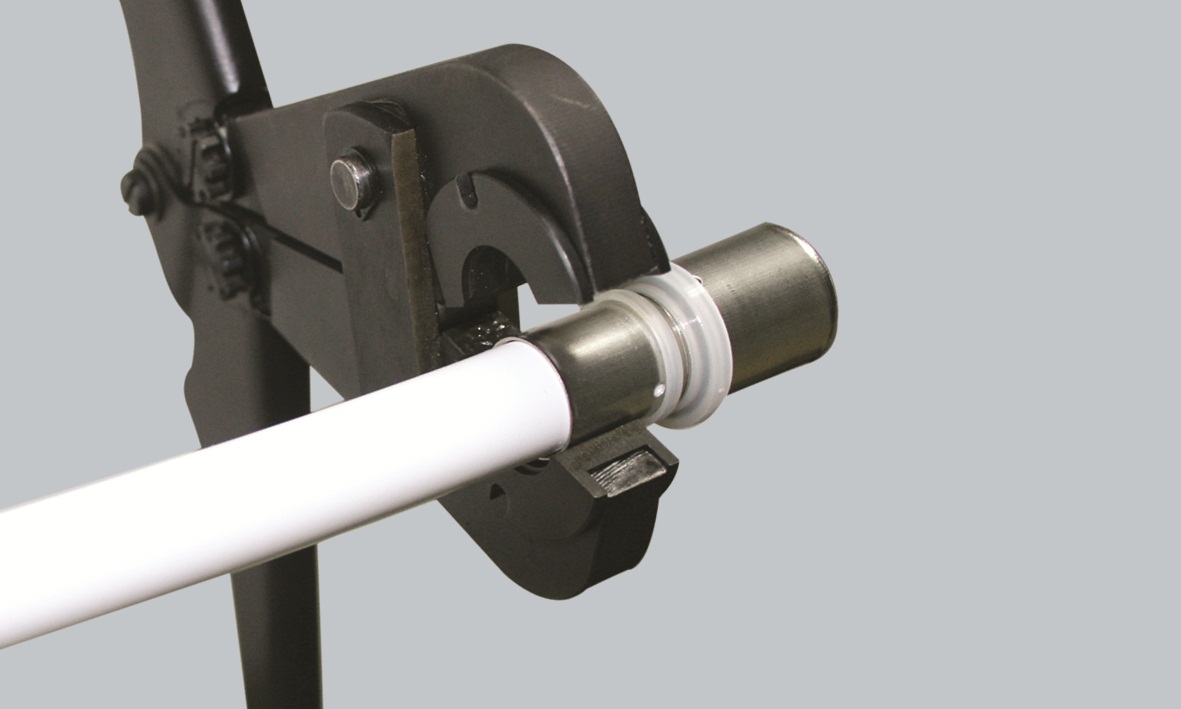
STEP 1
To cut the pipe ensure the blade of the cutter is straight across the pipe. This will ensure a firm connection to the fitting.
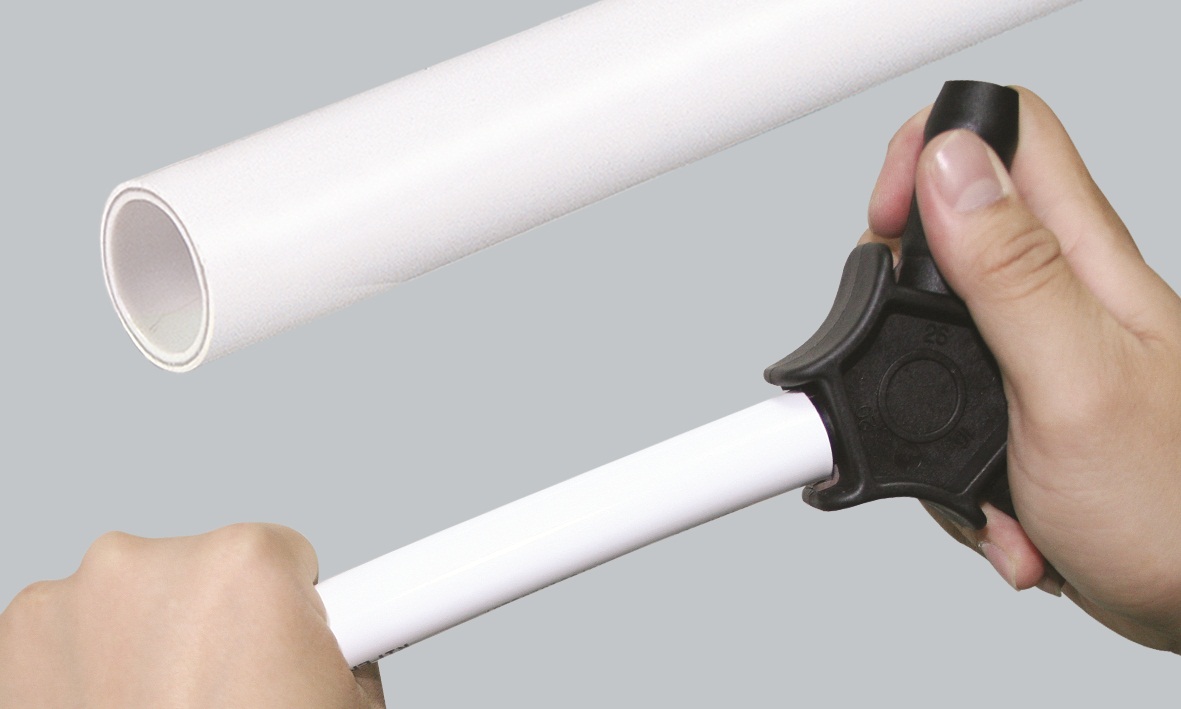
STEP 2
Prepare the ends with the reamer. Push into the pipe and while exerting pressure, twist the bevel all the way round. Plastic shavings should come away from the pipe. The bevel is complete when no more appear.
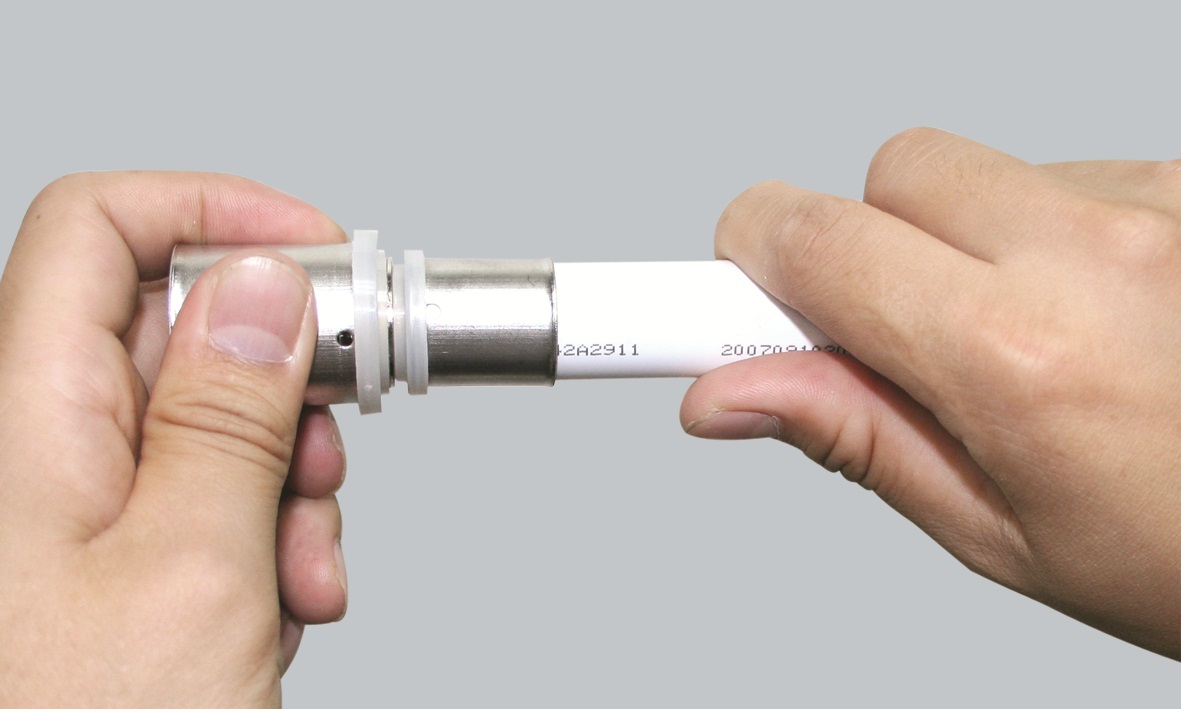
STEP 3
When fitted, ensure that the double O-rings are intact and free of dirt. Push the crimp firmly into the bevelled pipe. Check that the pipe can be seen through the three holes in the sleeve of the pipe. This indicates that it is fully inserted.
STEP 4
Clamp together firmly. Manual clamps should apply approximately 5 kg of pressure at the head. Powered clamps should be properly calibrated, and use U-profile jaws. Ensure the clamp head is flush with the plastic disc at the base of the fitting and press.
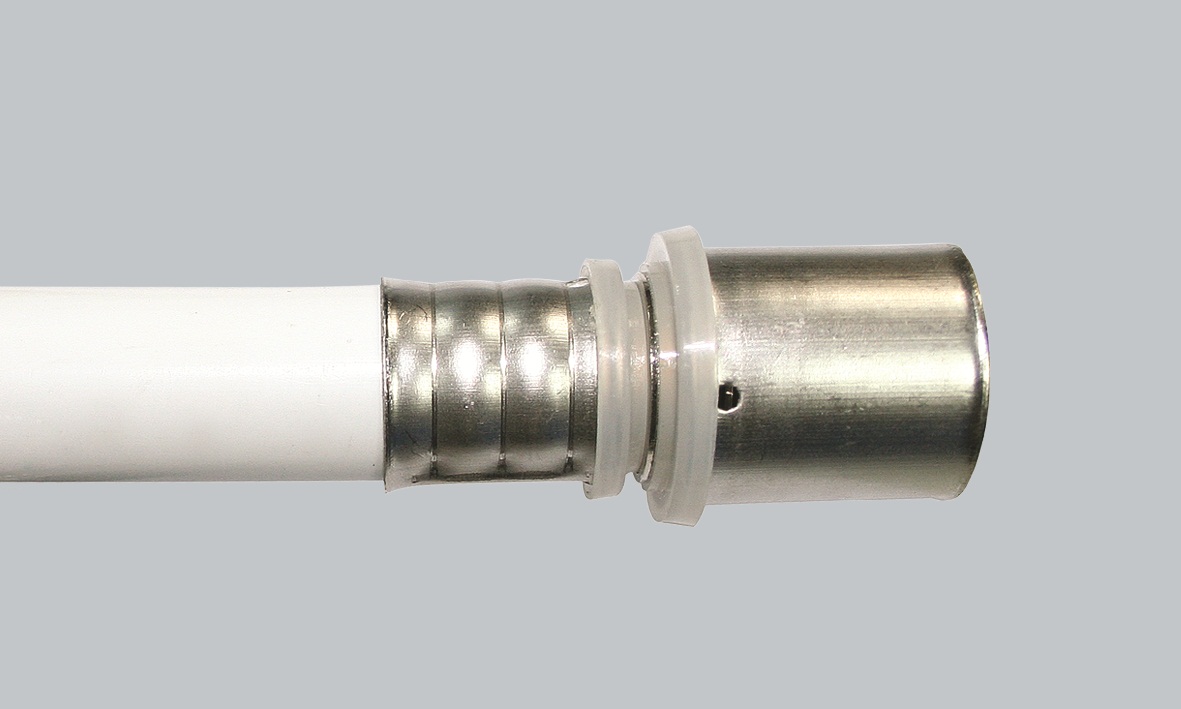
STEP 5
Check the fitting. It should appear as pictured below. There should be three lines going straight around the sleeve. This forms a hard wearing seal over the double O-rings. This completes the crimp fitting.